
A few different things motivated my approach to this dish. One of my biggest desires was to do something different with a cut of meat that I have smoked outdoors or slow roasted countless times in the oven and I simply wanted to alter the presentation and method of preparation. Call it boredom or experimentation, but I didn’t want to go down the same road I had traveled so many times before and end up with a huge, super tender hunk of meat which would fall apart the first time you probed it with a fork… Though there is something to be said for that. Everything has a time and a place. Much more, I wanted something that I could slice into, lay out as medallions and serve as whole pieces with a reduction of the braising liquids as well as the remaining mirepoix and apple additions.
You’ll hear me use the term “additions” frequently as I describe the process and methodology of making this dish and others. When I mentally prepare, or imagine a dish, I visualize the various stages of construction of most meals through the view-port of “additions”. The additions are my markers for timing and represent the advancing stages of a dish. Mostly this applies to braising, gumbos, jambalayas and any dishes where ingredients are methodically added in a certain progression. Me? I call them additions. Just my way of doing things.
It’s an approach which I first witnessed in the cooking of Paul Prudhomme and one which I’m happy to have integrated into my own cooking. I doubt it’s unique to either of us. It’s just the proper way to do things. Each component of a dish, certainly in the initial stages of browning vegetables, brings its own qualities to the final product when added incrementally during the process. From the French mirepoix, or the Cajun/Creole Trinity, to the Indian sequence of onions, garlic and ginger, every addition to a dish and the timing of said additions will have a result effecting the quality and complexity of what finally ends up on the plate. This would be the exact opposite of what my buddy and fellow chef “JK” refers to as “everyone in the boat” cooking – where all of the ingredients are hurriedly added to the pot with little attention or care as to what their contribution will be to the final flavor. One way you can measure the results. The other you’re simply hoping for a decent outcome.
But enough of that. Let’s get to cooking.
This next photo assumes the following (mostly because I didn’t photograph any of the initial preparation of the meat. Maybe I will someday.)
You’ve obtained a boneless Boston butt pork shoulder or boned one out yourself. In this example it’s one of Costco’s 5-7 lb boneless shoulders which come 2 to a pack. Some discussion could certainly be had about sourcing good shoulders – but at a later date.
You’ve butterflied said shoulder and laid it out end to end, somewhere in the neighborhood of 24″ long and 6″ to 8″ wide across the surface. This video will give you the basic concept of how to butterfly a pork shoulder. I elected though to go along the length of the shoulder and create two rolls out of the single shoulder.

You’ve seasoned the inside of the pork shoulder, rolled it in on itself and trussed the meat. In this example the seasonings are (in descending order of aggressiveness) salt, pepper, freshly ground cumin, allspice, clove and dried marjoram). For trussing the meat – a silly simple, yet highly effective method for trussing can be found here.
Begin to brown the meat slowly in a decent amount of olive oil, but not too much. It’s a lengthy browning process so don’t be in a hurry, but be sure to have enough heat to effectively brown and not stew the meat. If you see bubbles and liquid rather than hear a continuous, crisp sizzle from the pan – you need more heat. Best bet is to not add cold meat to a cold pan. As Gordon Ramsey would tell you, “Hot pan. Cold oil. Then add the meat.” It’s advice to live by. It really helps to have a clad, heavy bottomed, stainless or ceramic braising or roasting pan or rondeau for this process. As the meat begins to take on color, add your sausage variety. In this case it was a thick-skinned kielbasa and later, a sweet Italian sausage. Let those brown as well.
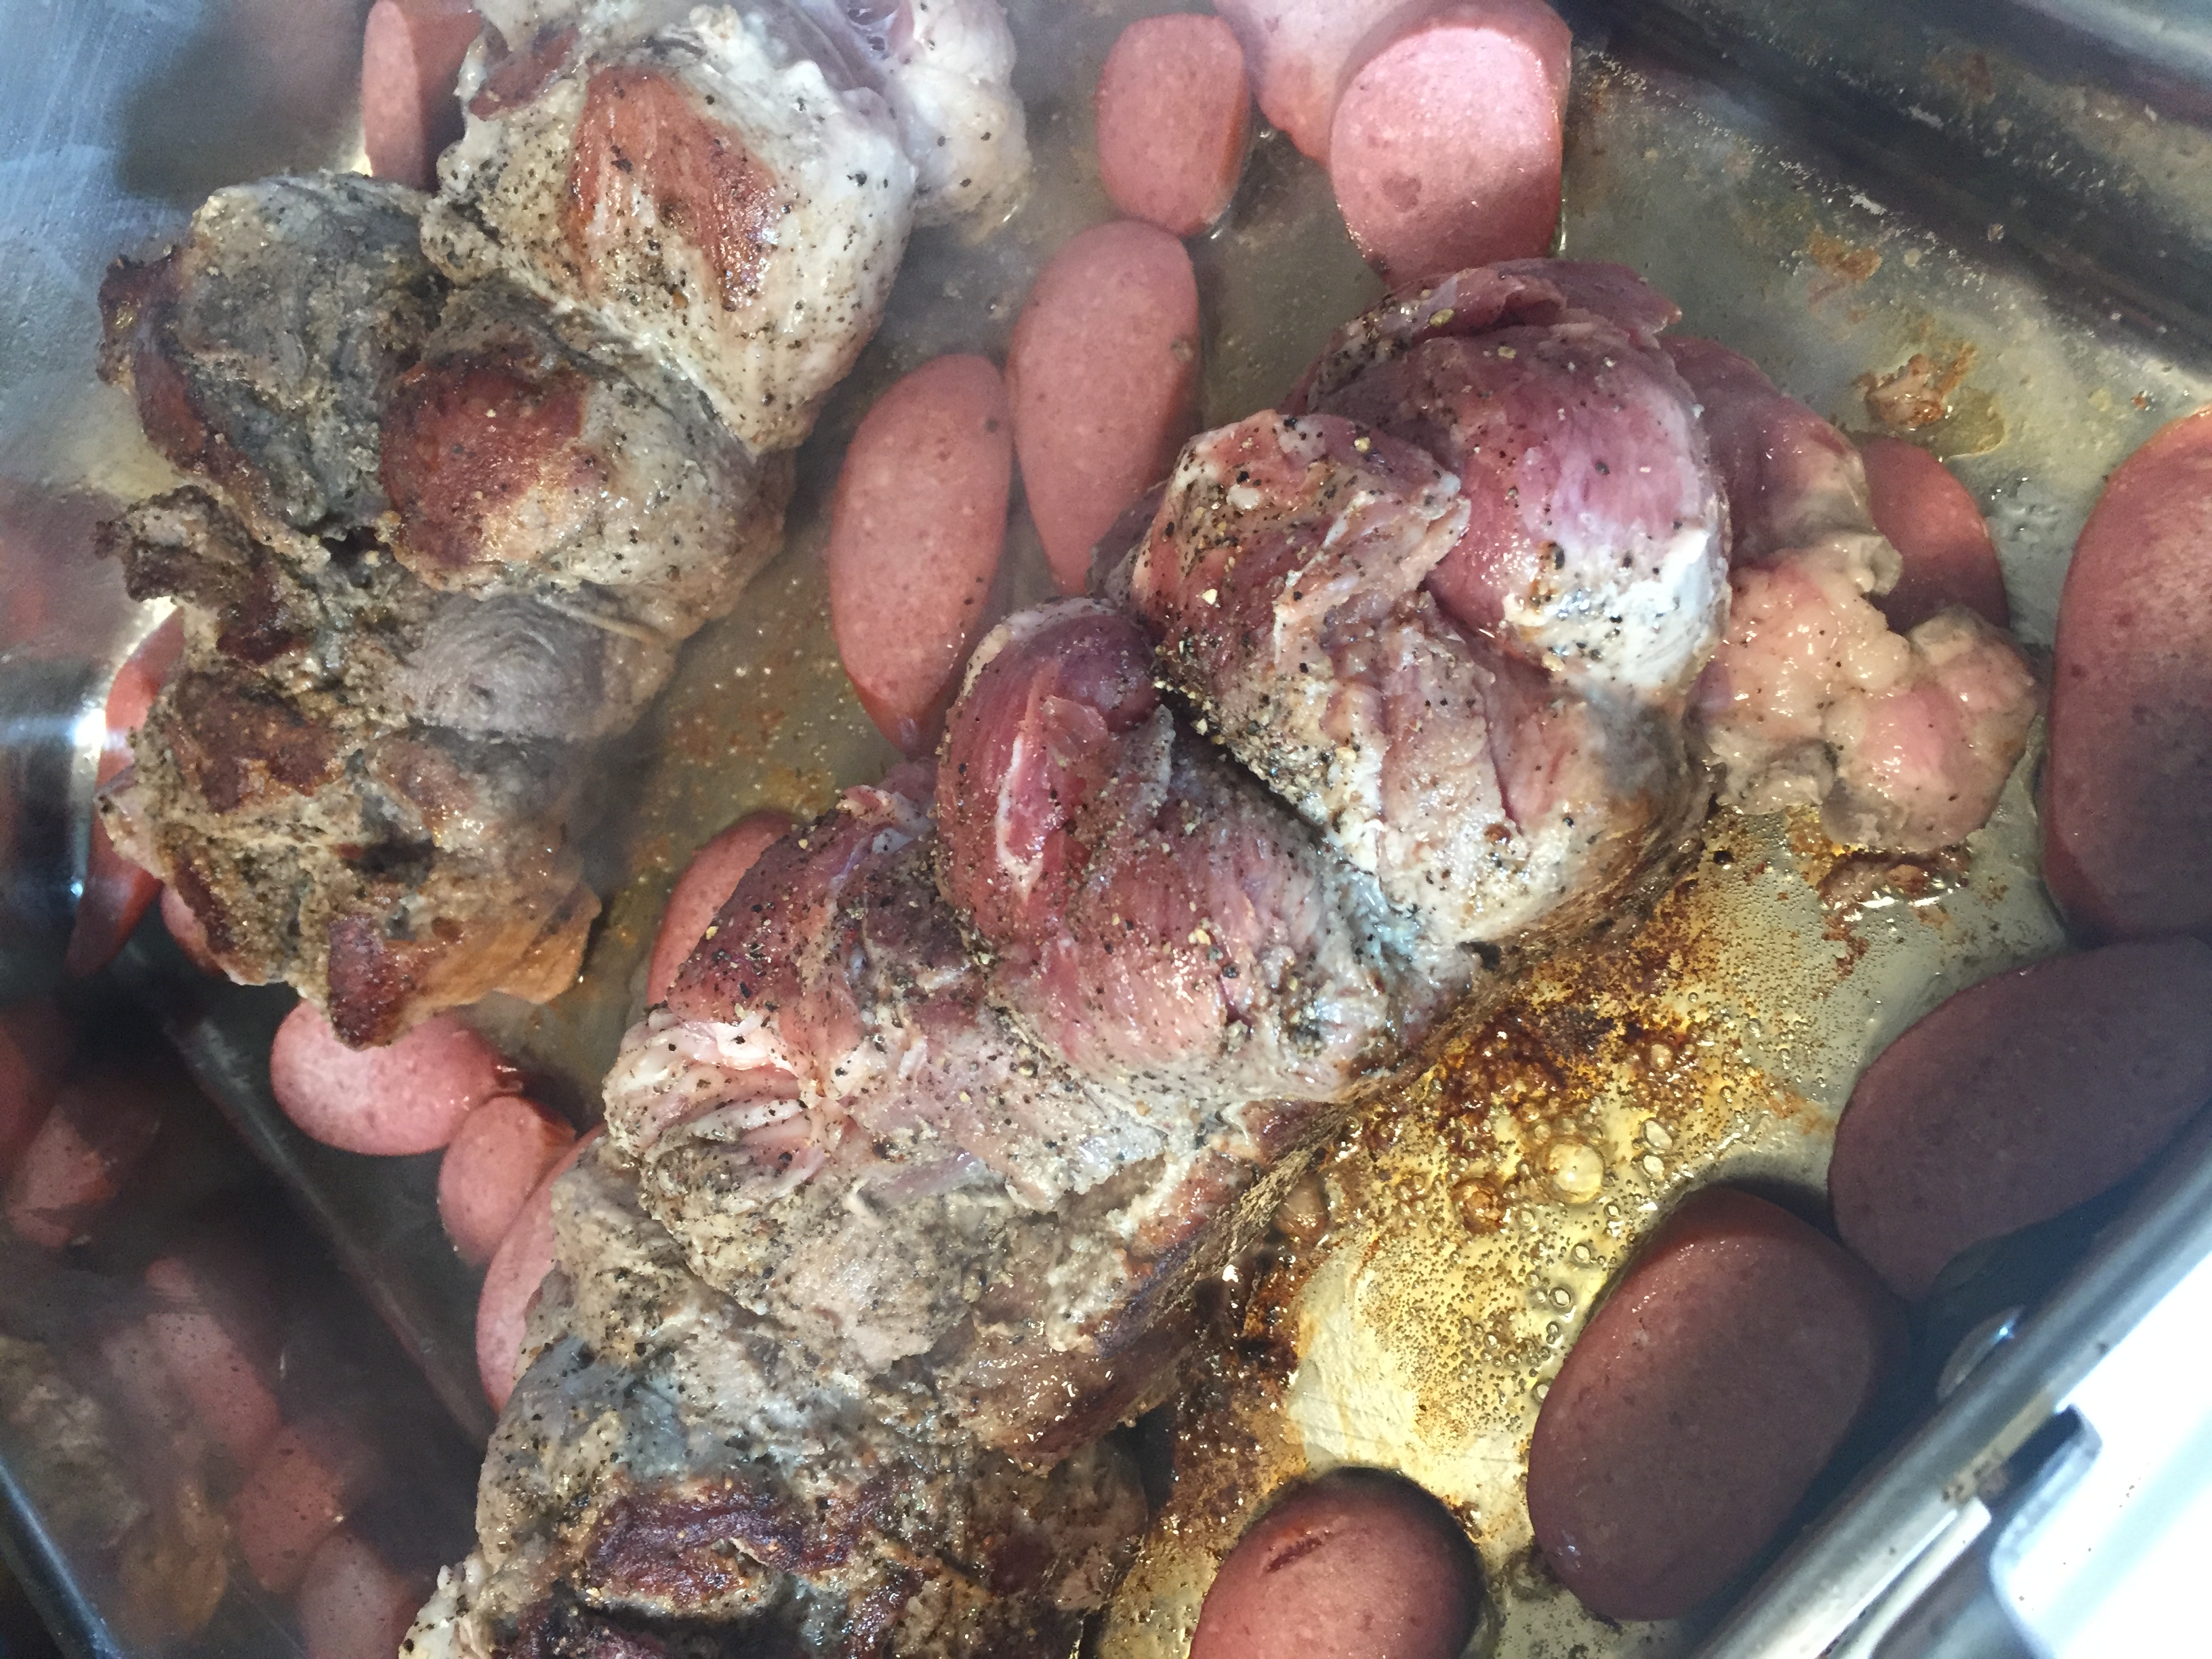
As the sausage begins to render and release its fat, its contribution to the dish will become apparent. The browning should increase significantly as more oil is now circulating around your primary protein. This has its benefits but not without a cost. Sausage, while it adds considerably flavorful fats and seasoning to the dish, you must be careful because here is where the dish can go south on you in a hurry if you’re not cautious. The renderings from the sausage will brown at a much faster pace than the pork shoulder and can and will burn before the pork is finished browning, so a careful eye must be kept on the process, making sure not to add the sausage too early or allow the render from the sausage to pool, brown too quickly and eventually blacken, which will add undesirable, off-flavors to the dish down the road. To once again quote Chef Ramsey, “Brown is cooked, black is burnt.”
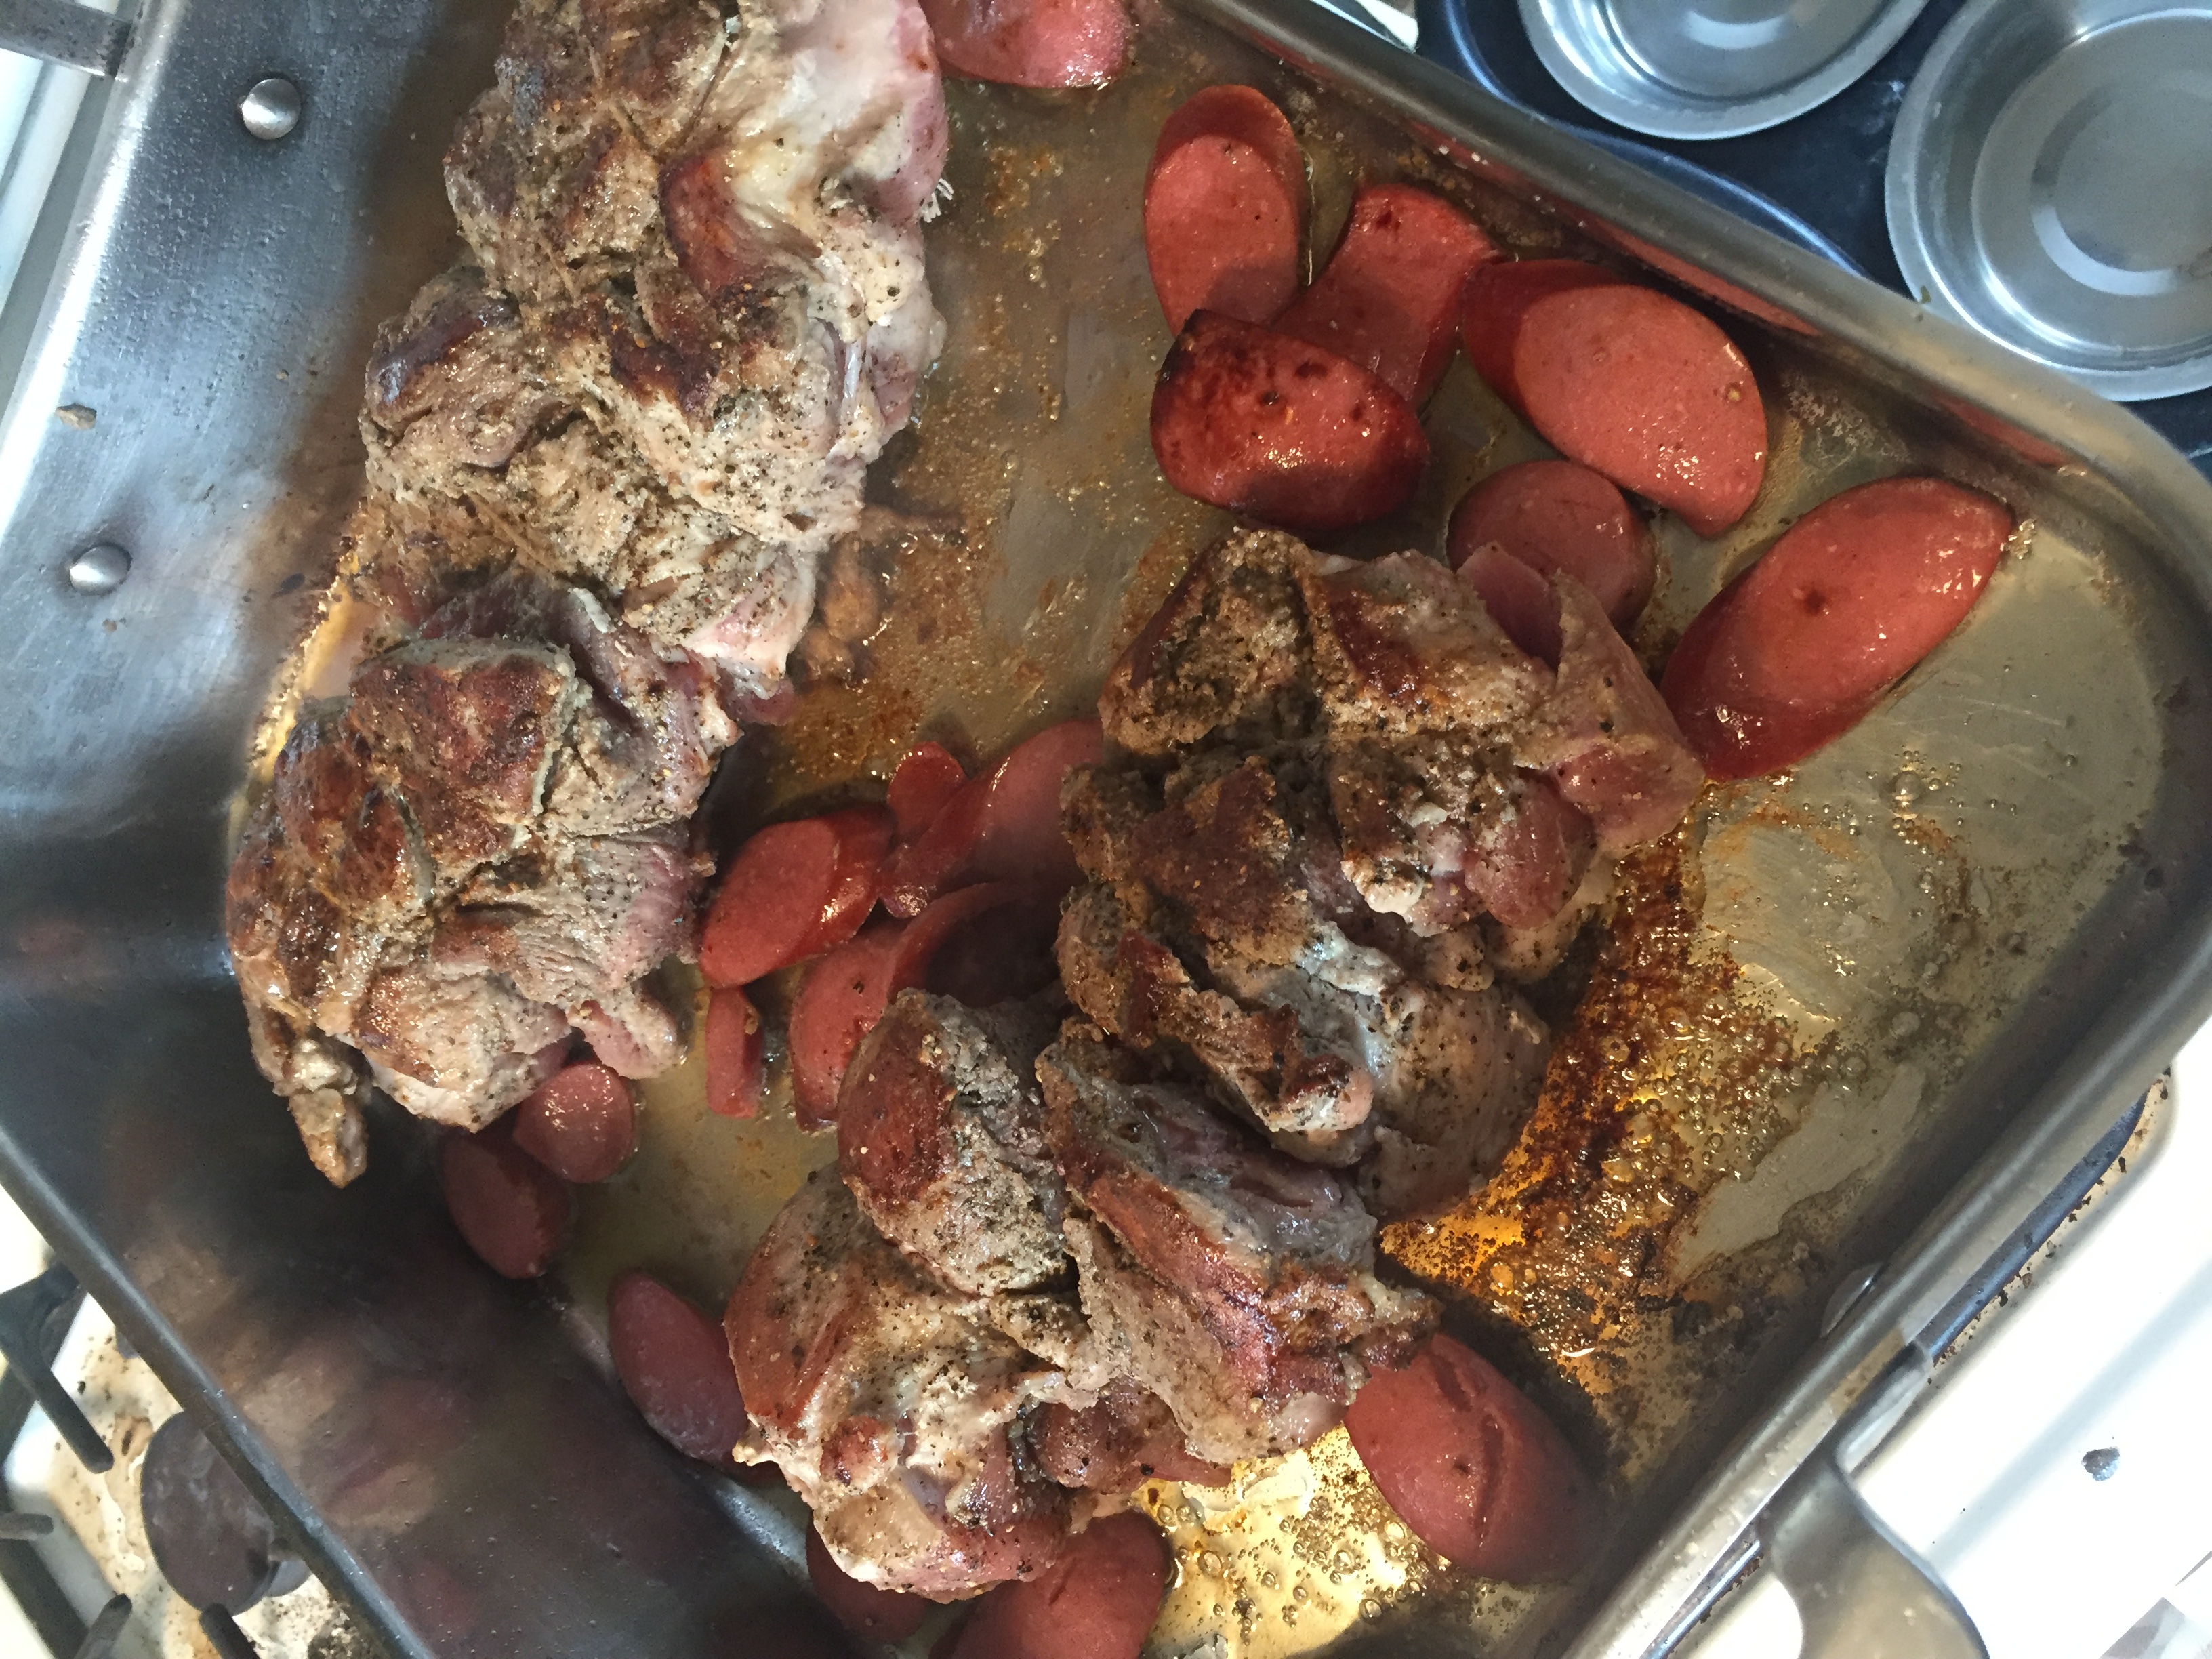
It’s a bit of a balancing act and not an incredibly hard one to pull off. Just don’t leave the room during this part of the process. A few minutes on the phone could really muck things up a bit. In turn – don’t be afraid of a good, dark brown buildup on the pan, even a really dark brown. It’s your friend and will pay off later on. Remove the sausage first, then the meat a bit later if it still needs some color, then pour off most if not all of the oil from the browning process. It’s degraded by now and of little benefit from here on out. Reserve the Maillard leavings in the pan. We’ll get to them next.
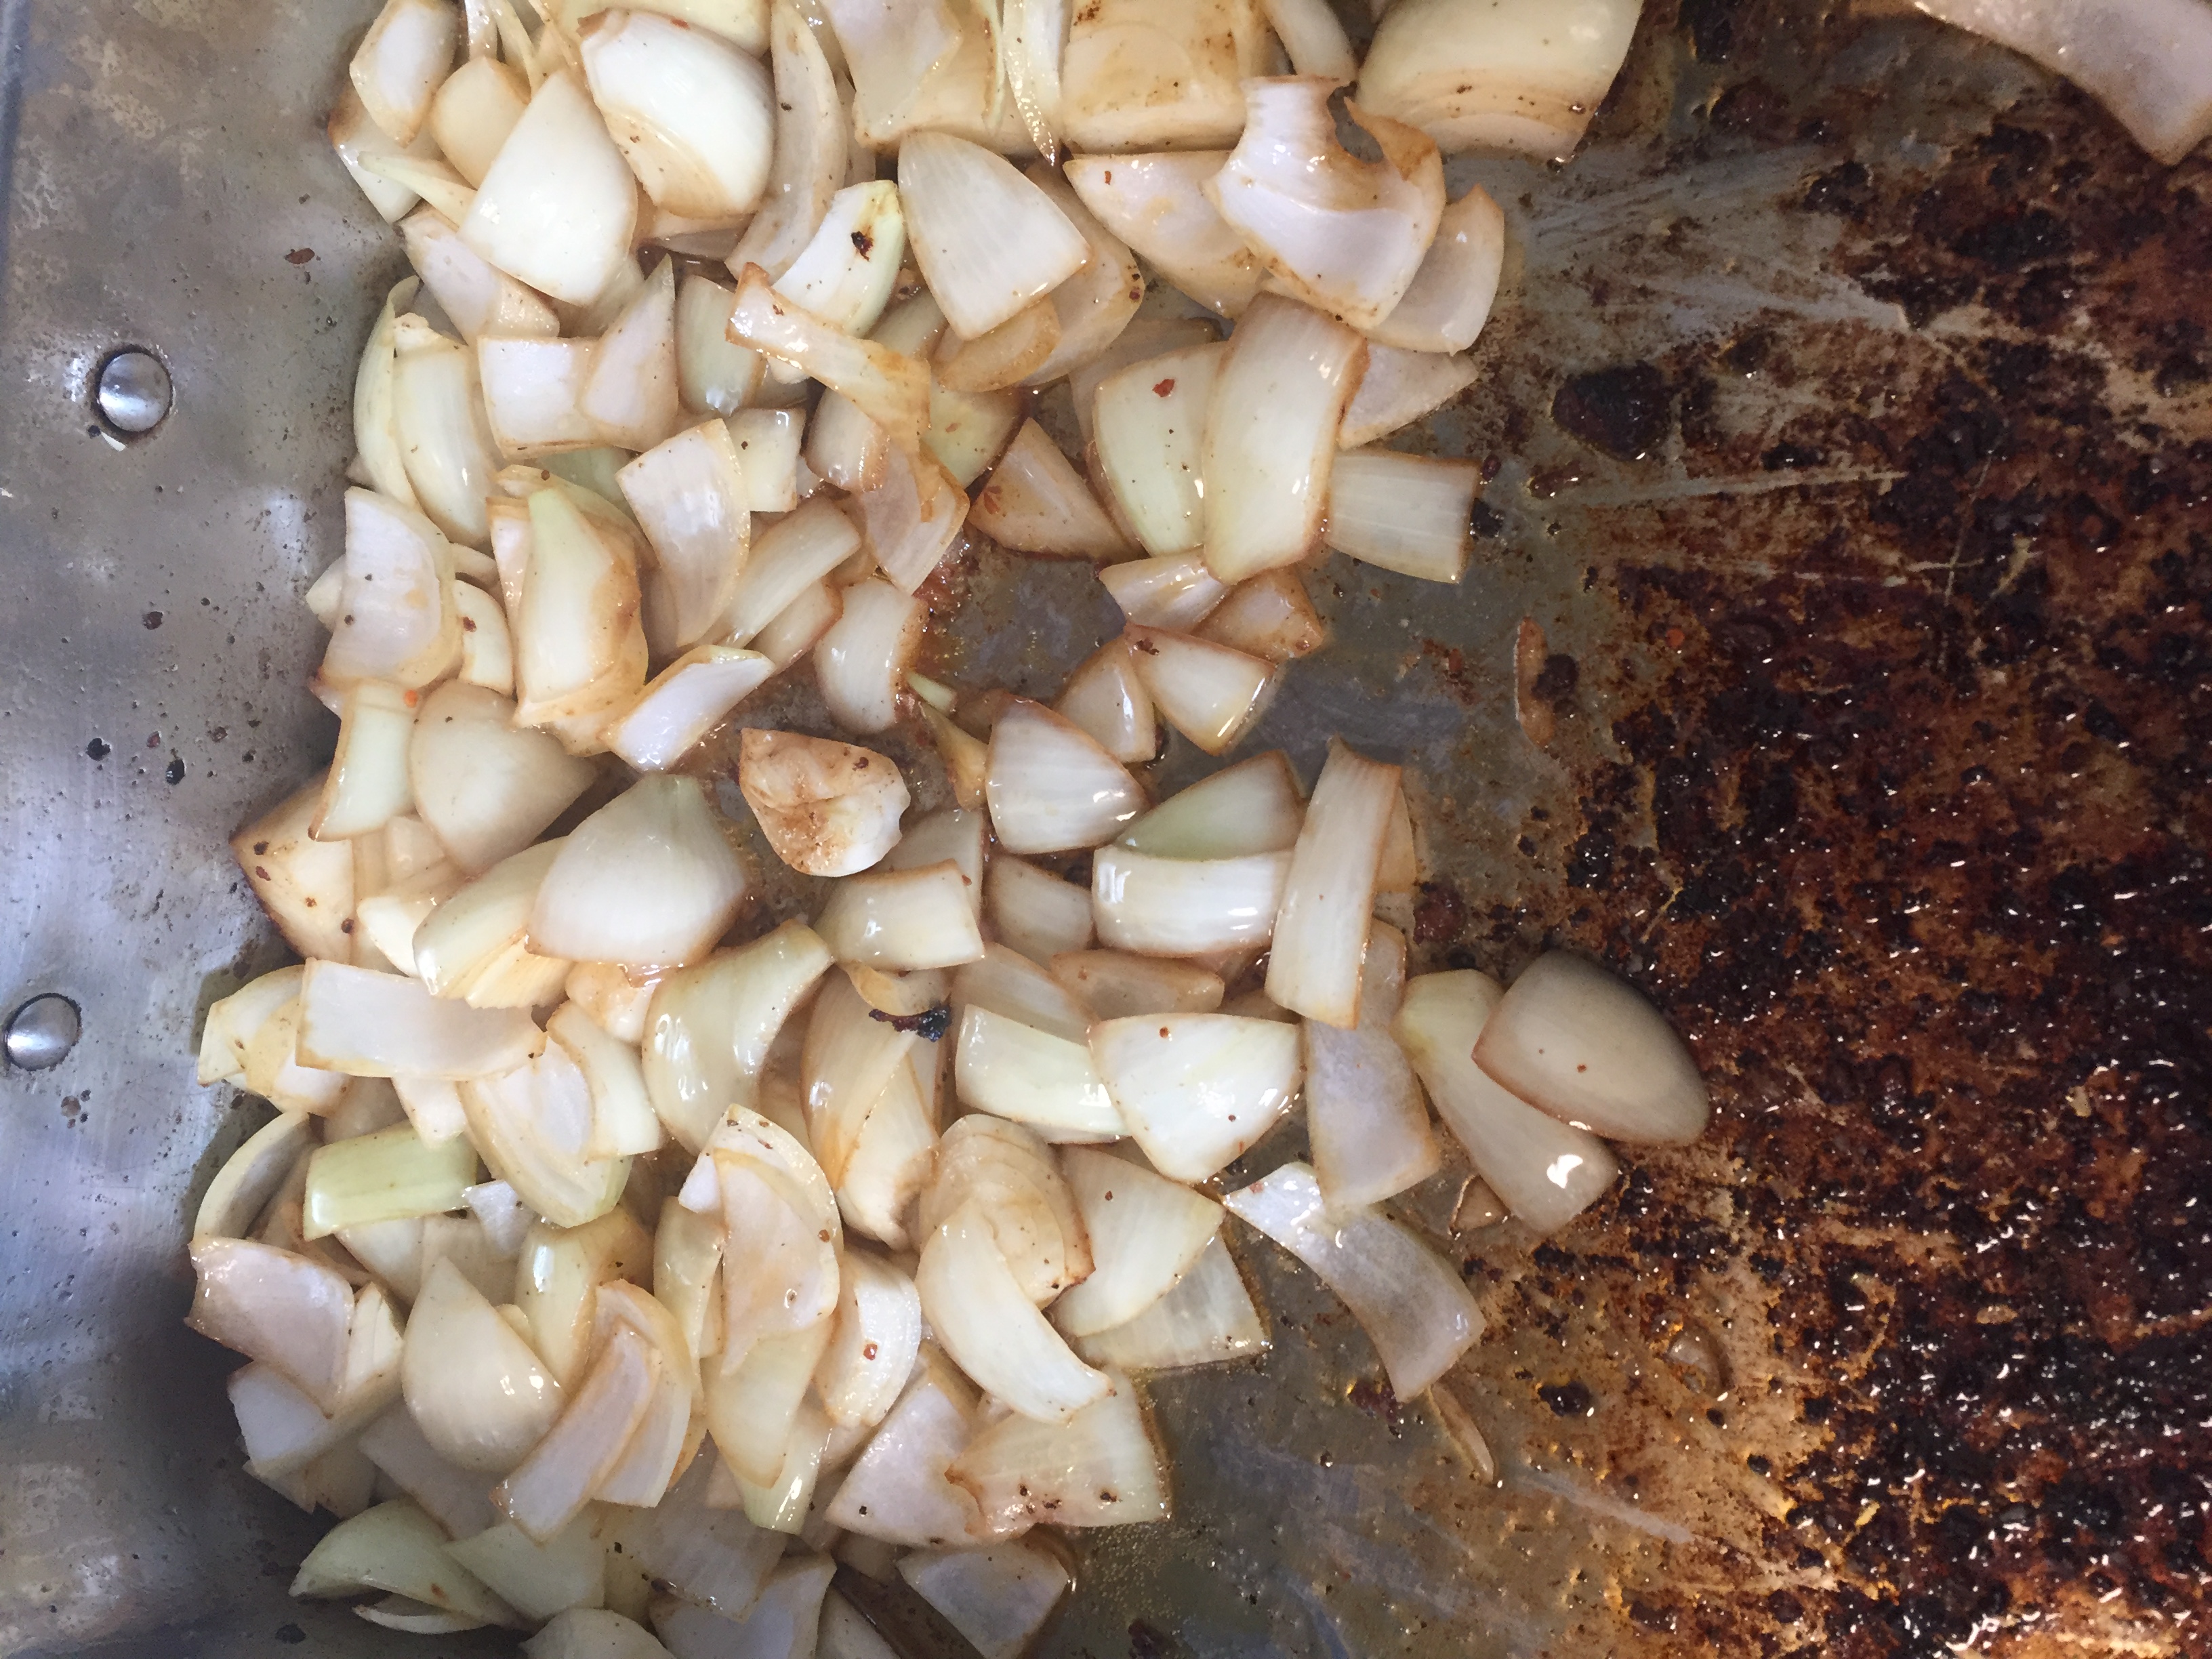
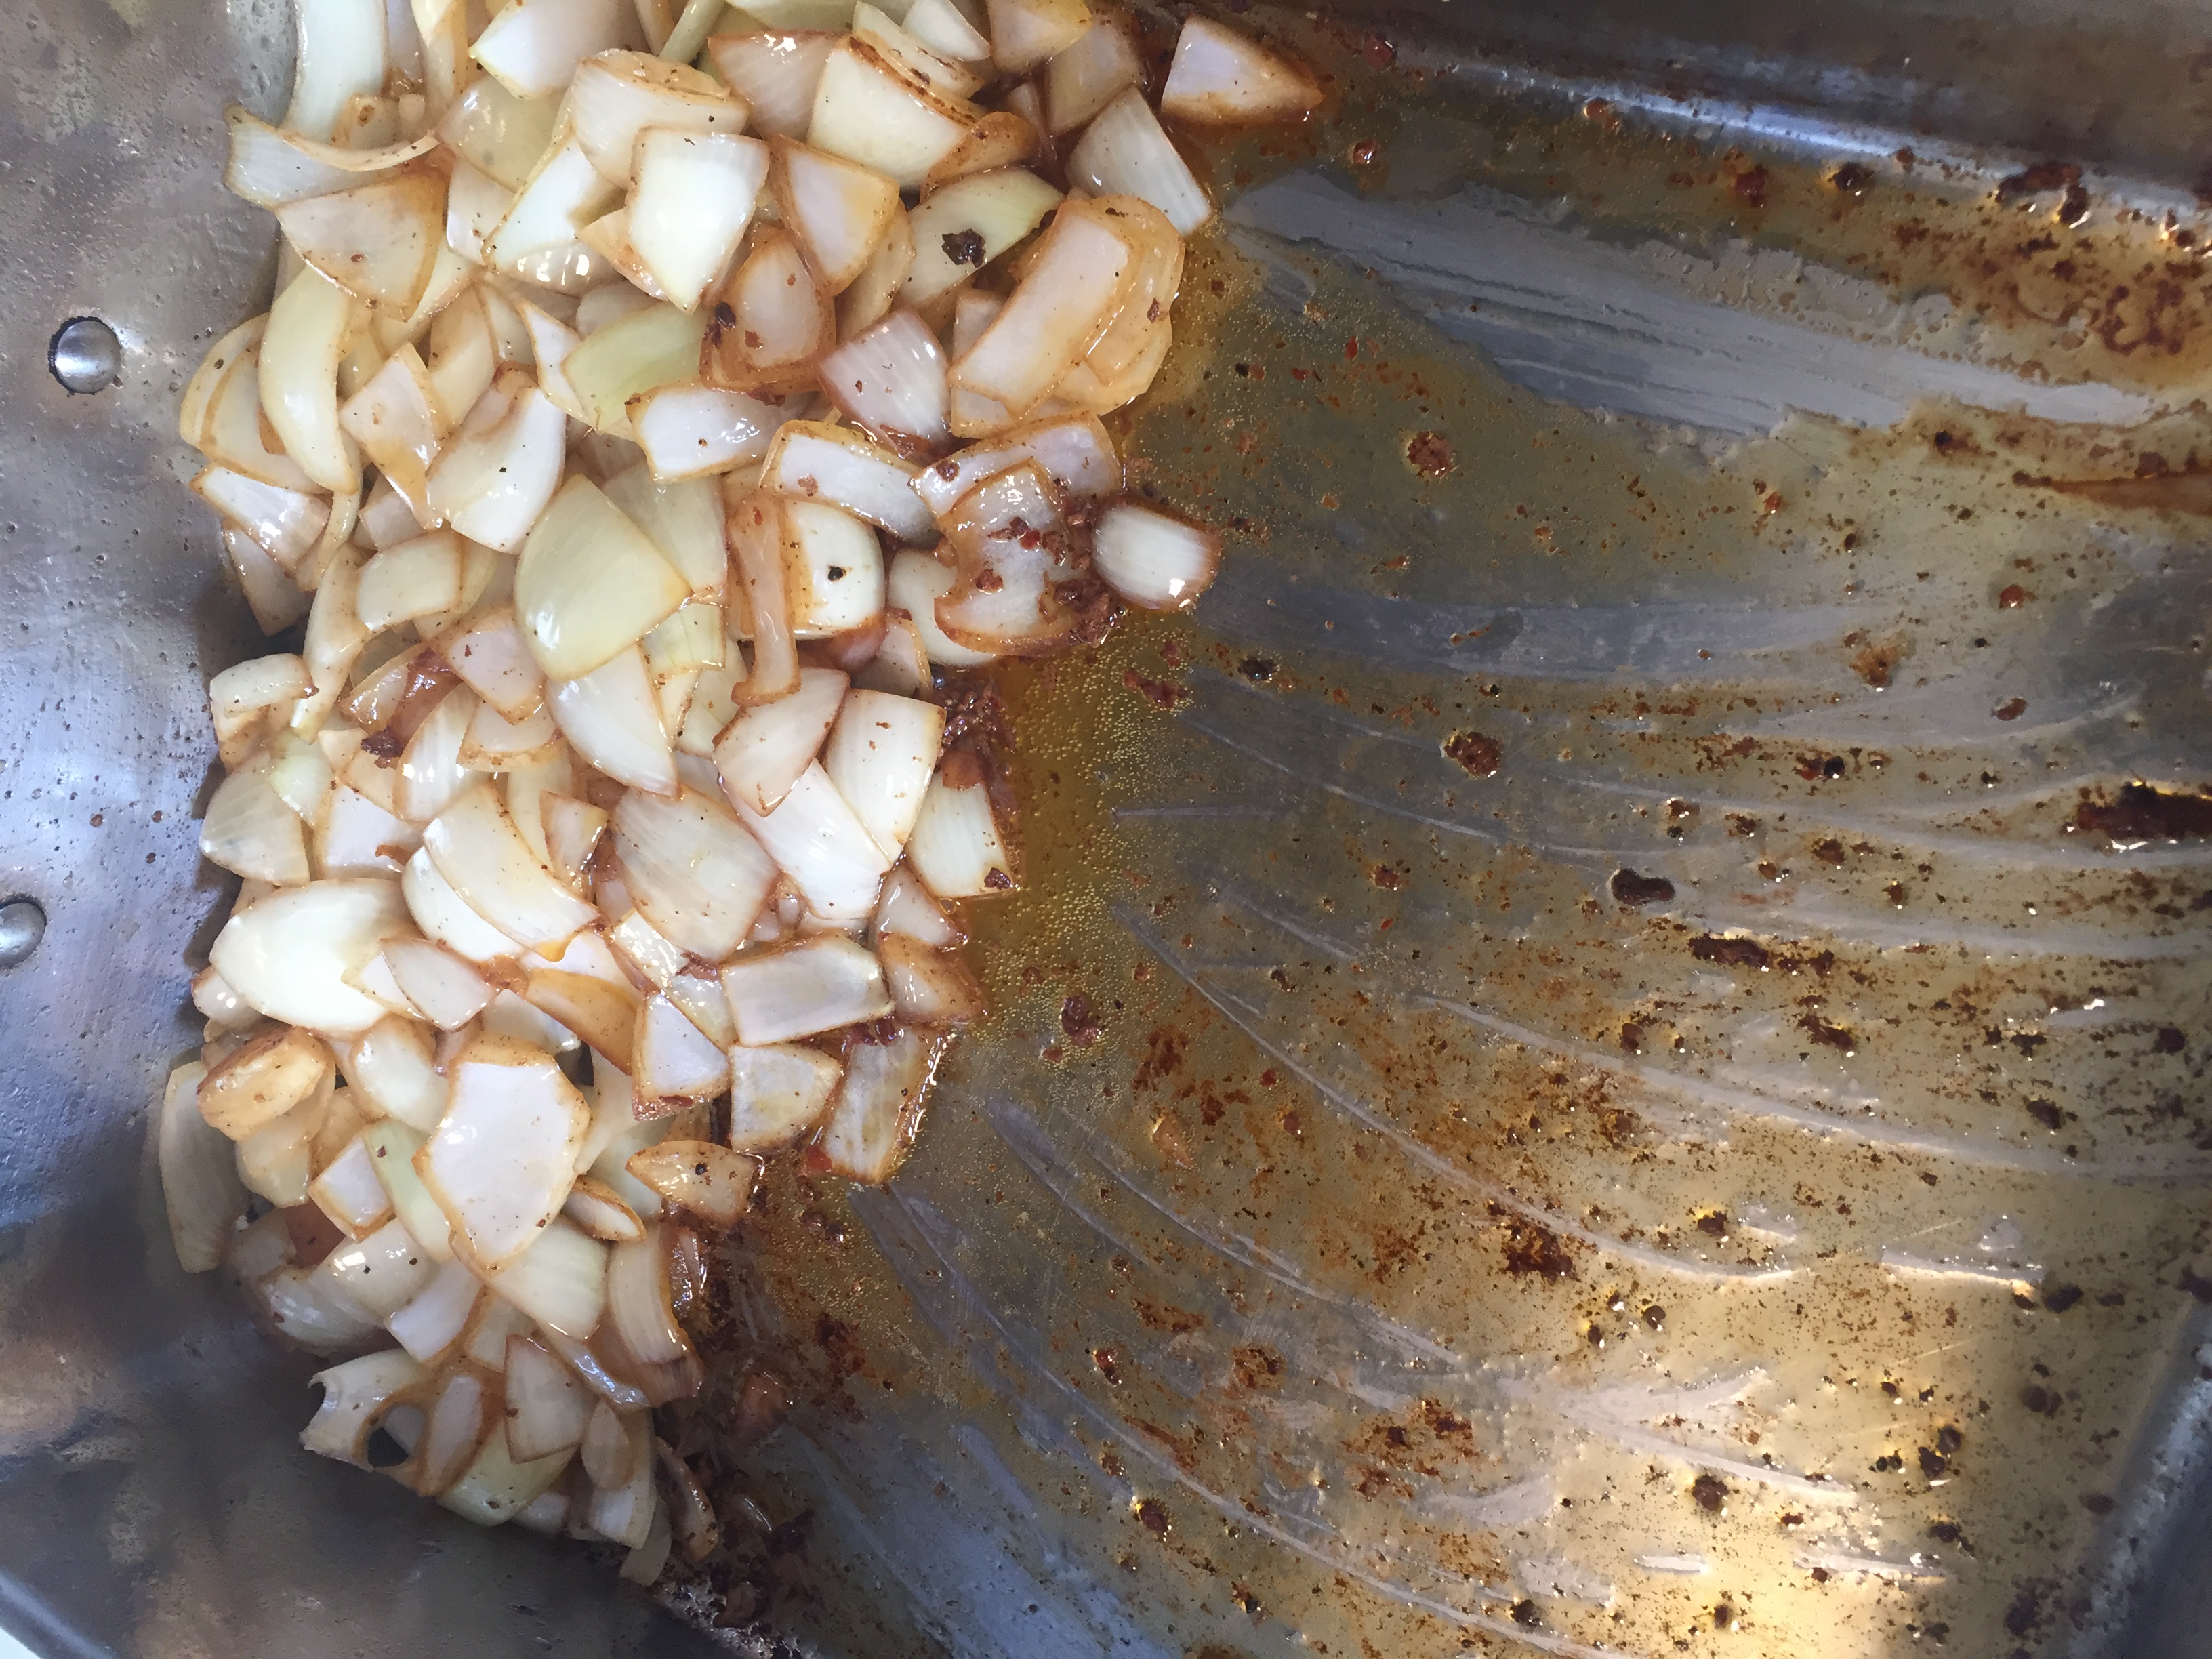
Rather than deglaze the pan with a liquid, we’ll add a bit of new olive oil, our onions, in this case two large yellow Spanish onions and a healthy pinch of kosher salt to get them sweating. The moisture they release should be adequate enough to get the brown bits in the pan to release. This pan is sitting across two burners which were on for the browning process. At this point it’s helpful to back down to one burner for the mirepoix additions and not spread undue heat on the side of the pan with no food. Move the onions back and forth until the pan comes clean and the renderings release. Then focus the onions on the hot side of the pan to continue the browning process. With enough heat – the sweating process will be short lived and the browning will begin. Once again – if you see bubbling liquid rather than hear a light sizzle – you need more heat. Adjust accordingly.
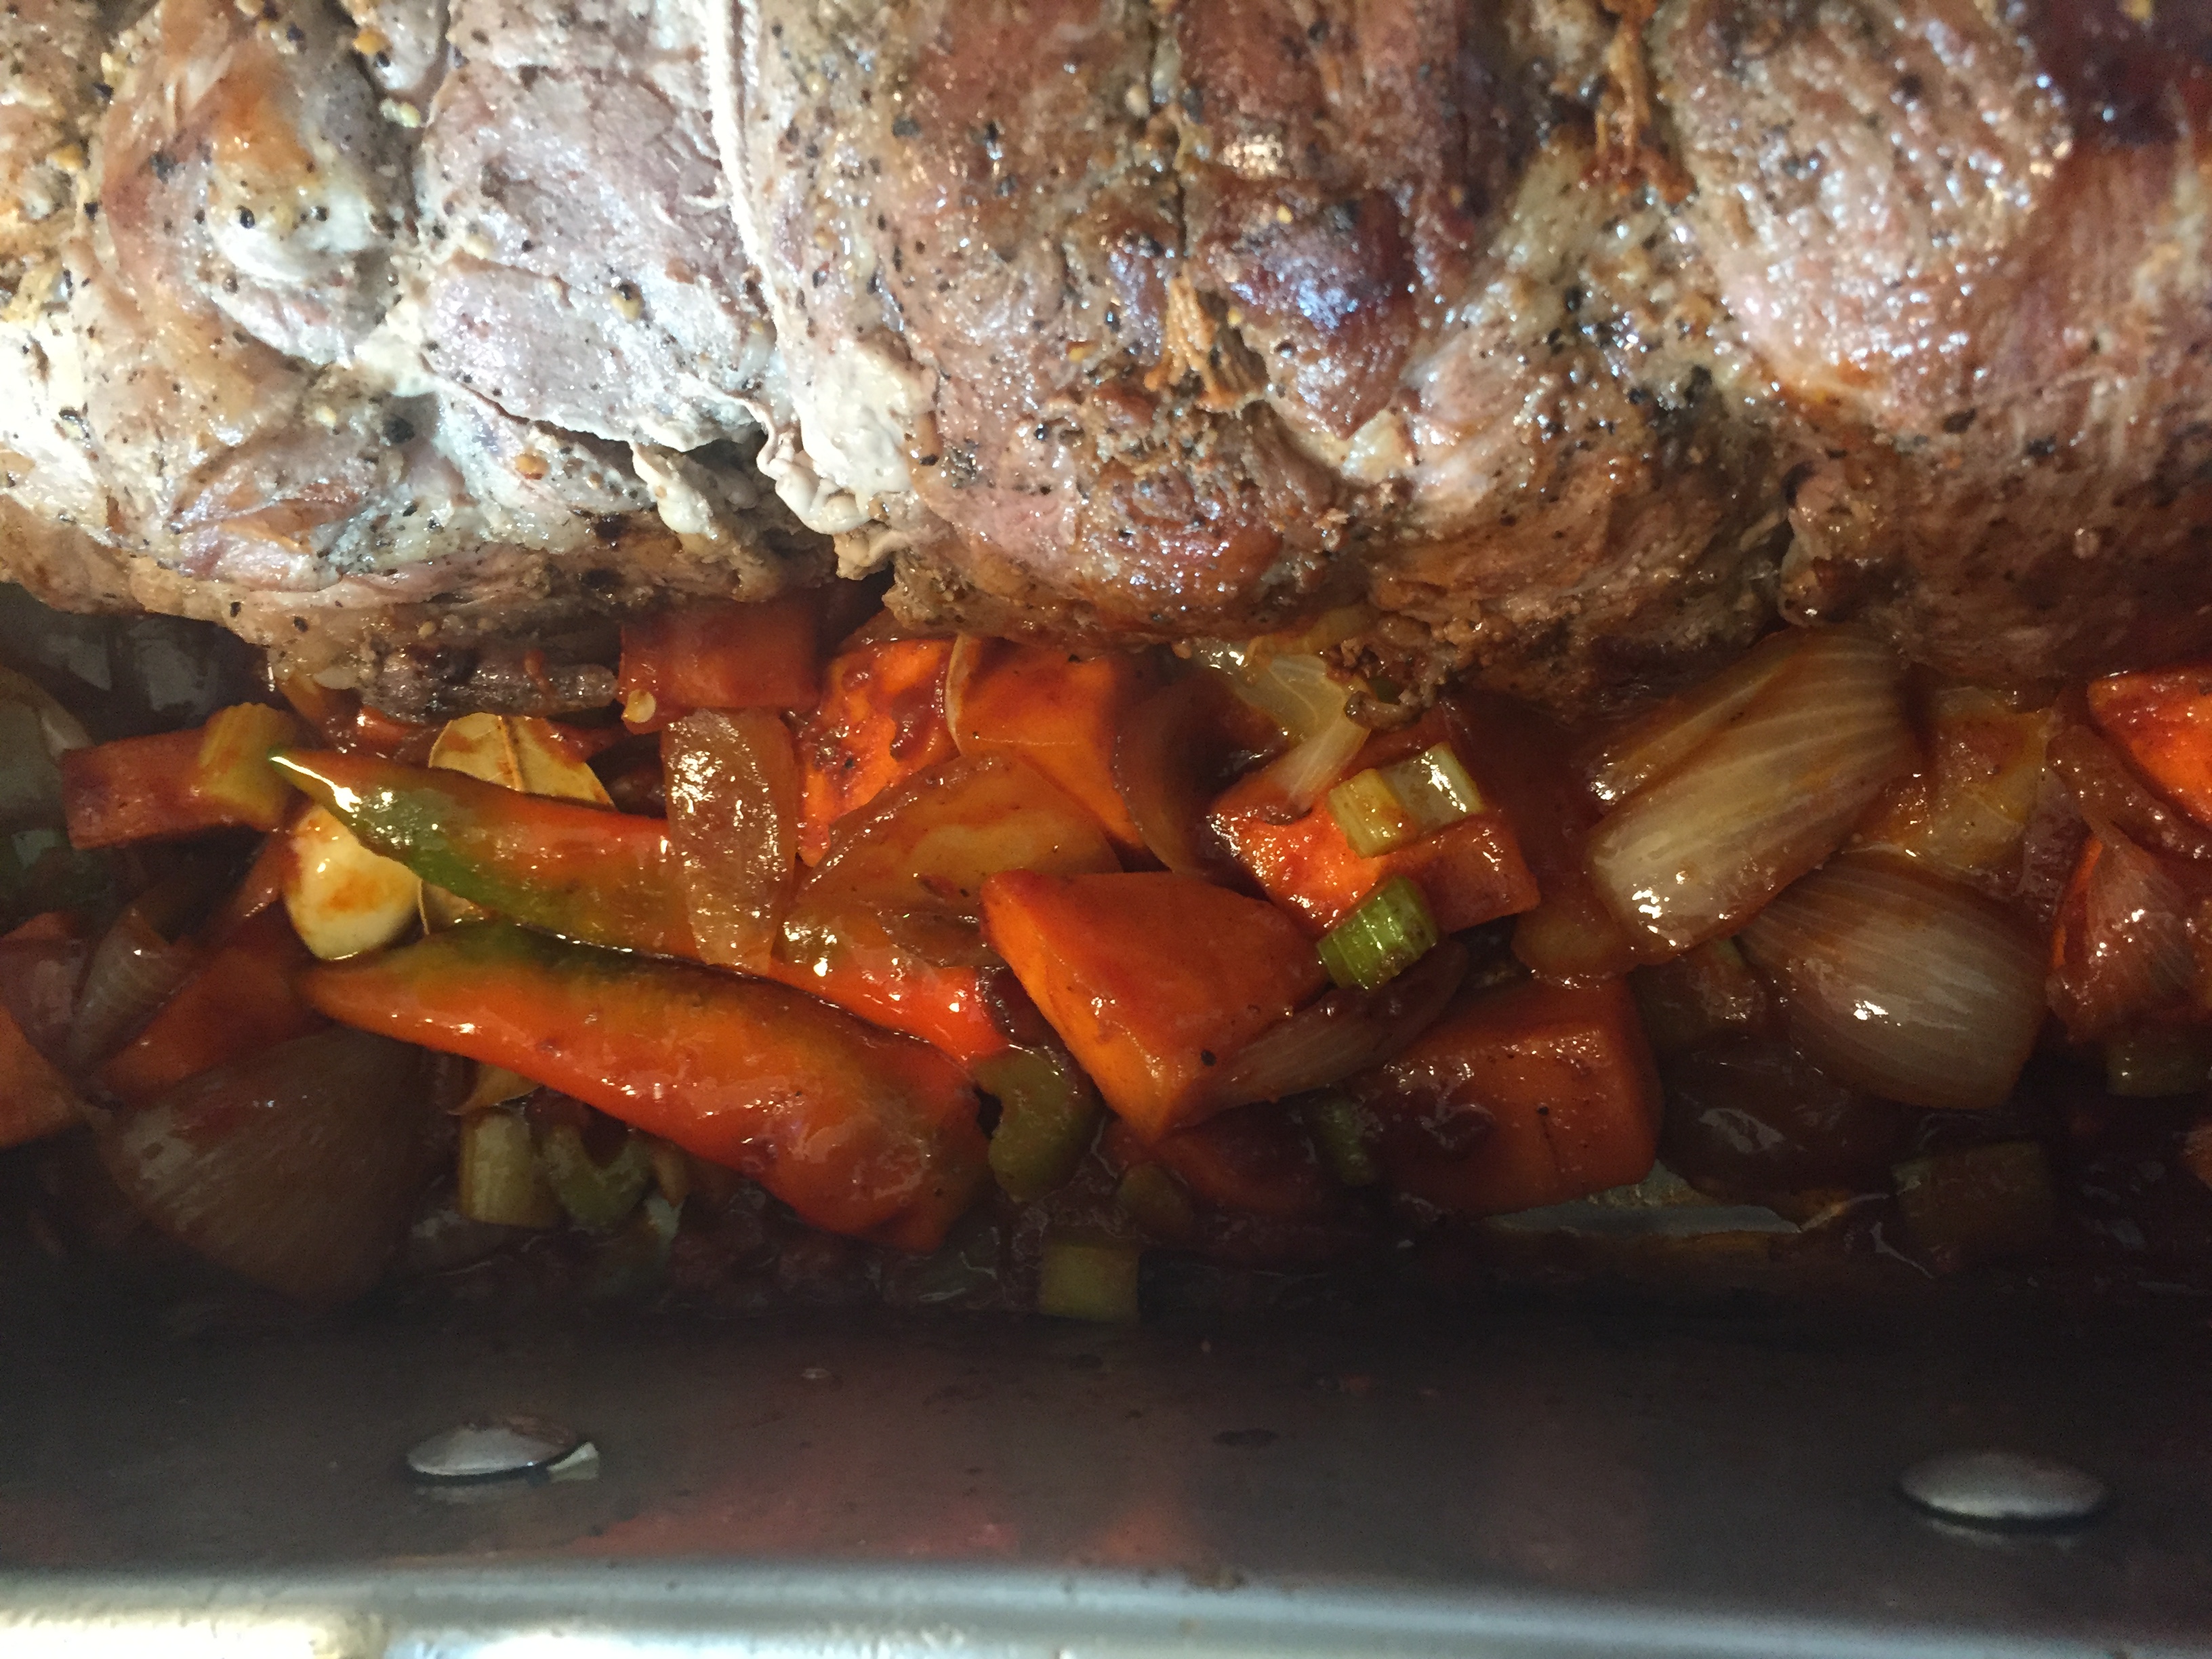
Once the onions have had their day in the sun and have reached the desired color, taking on some brown of their own rather than just that which was added by the pan drippings, it’s a perfect time for the carrots. This allows them to begin to take some color and make their initial aromatic contribution to the dish. It also slows the browning process of the onions, preventing them from burning.
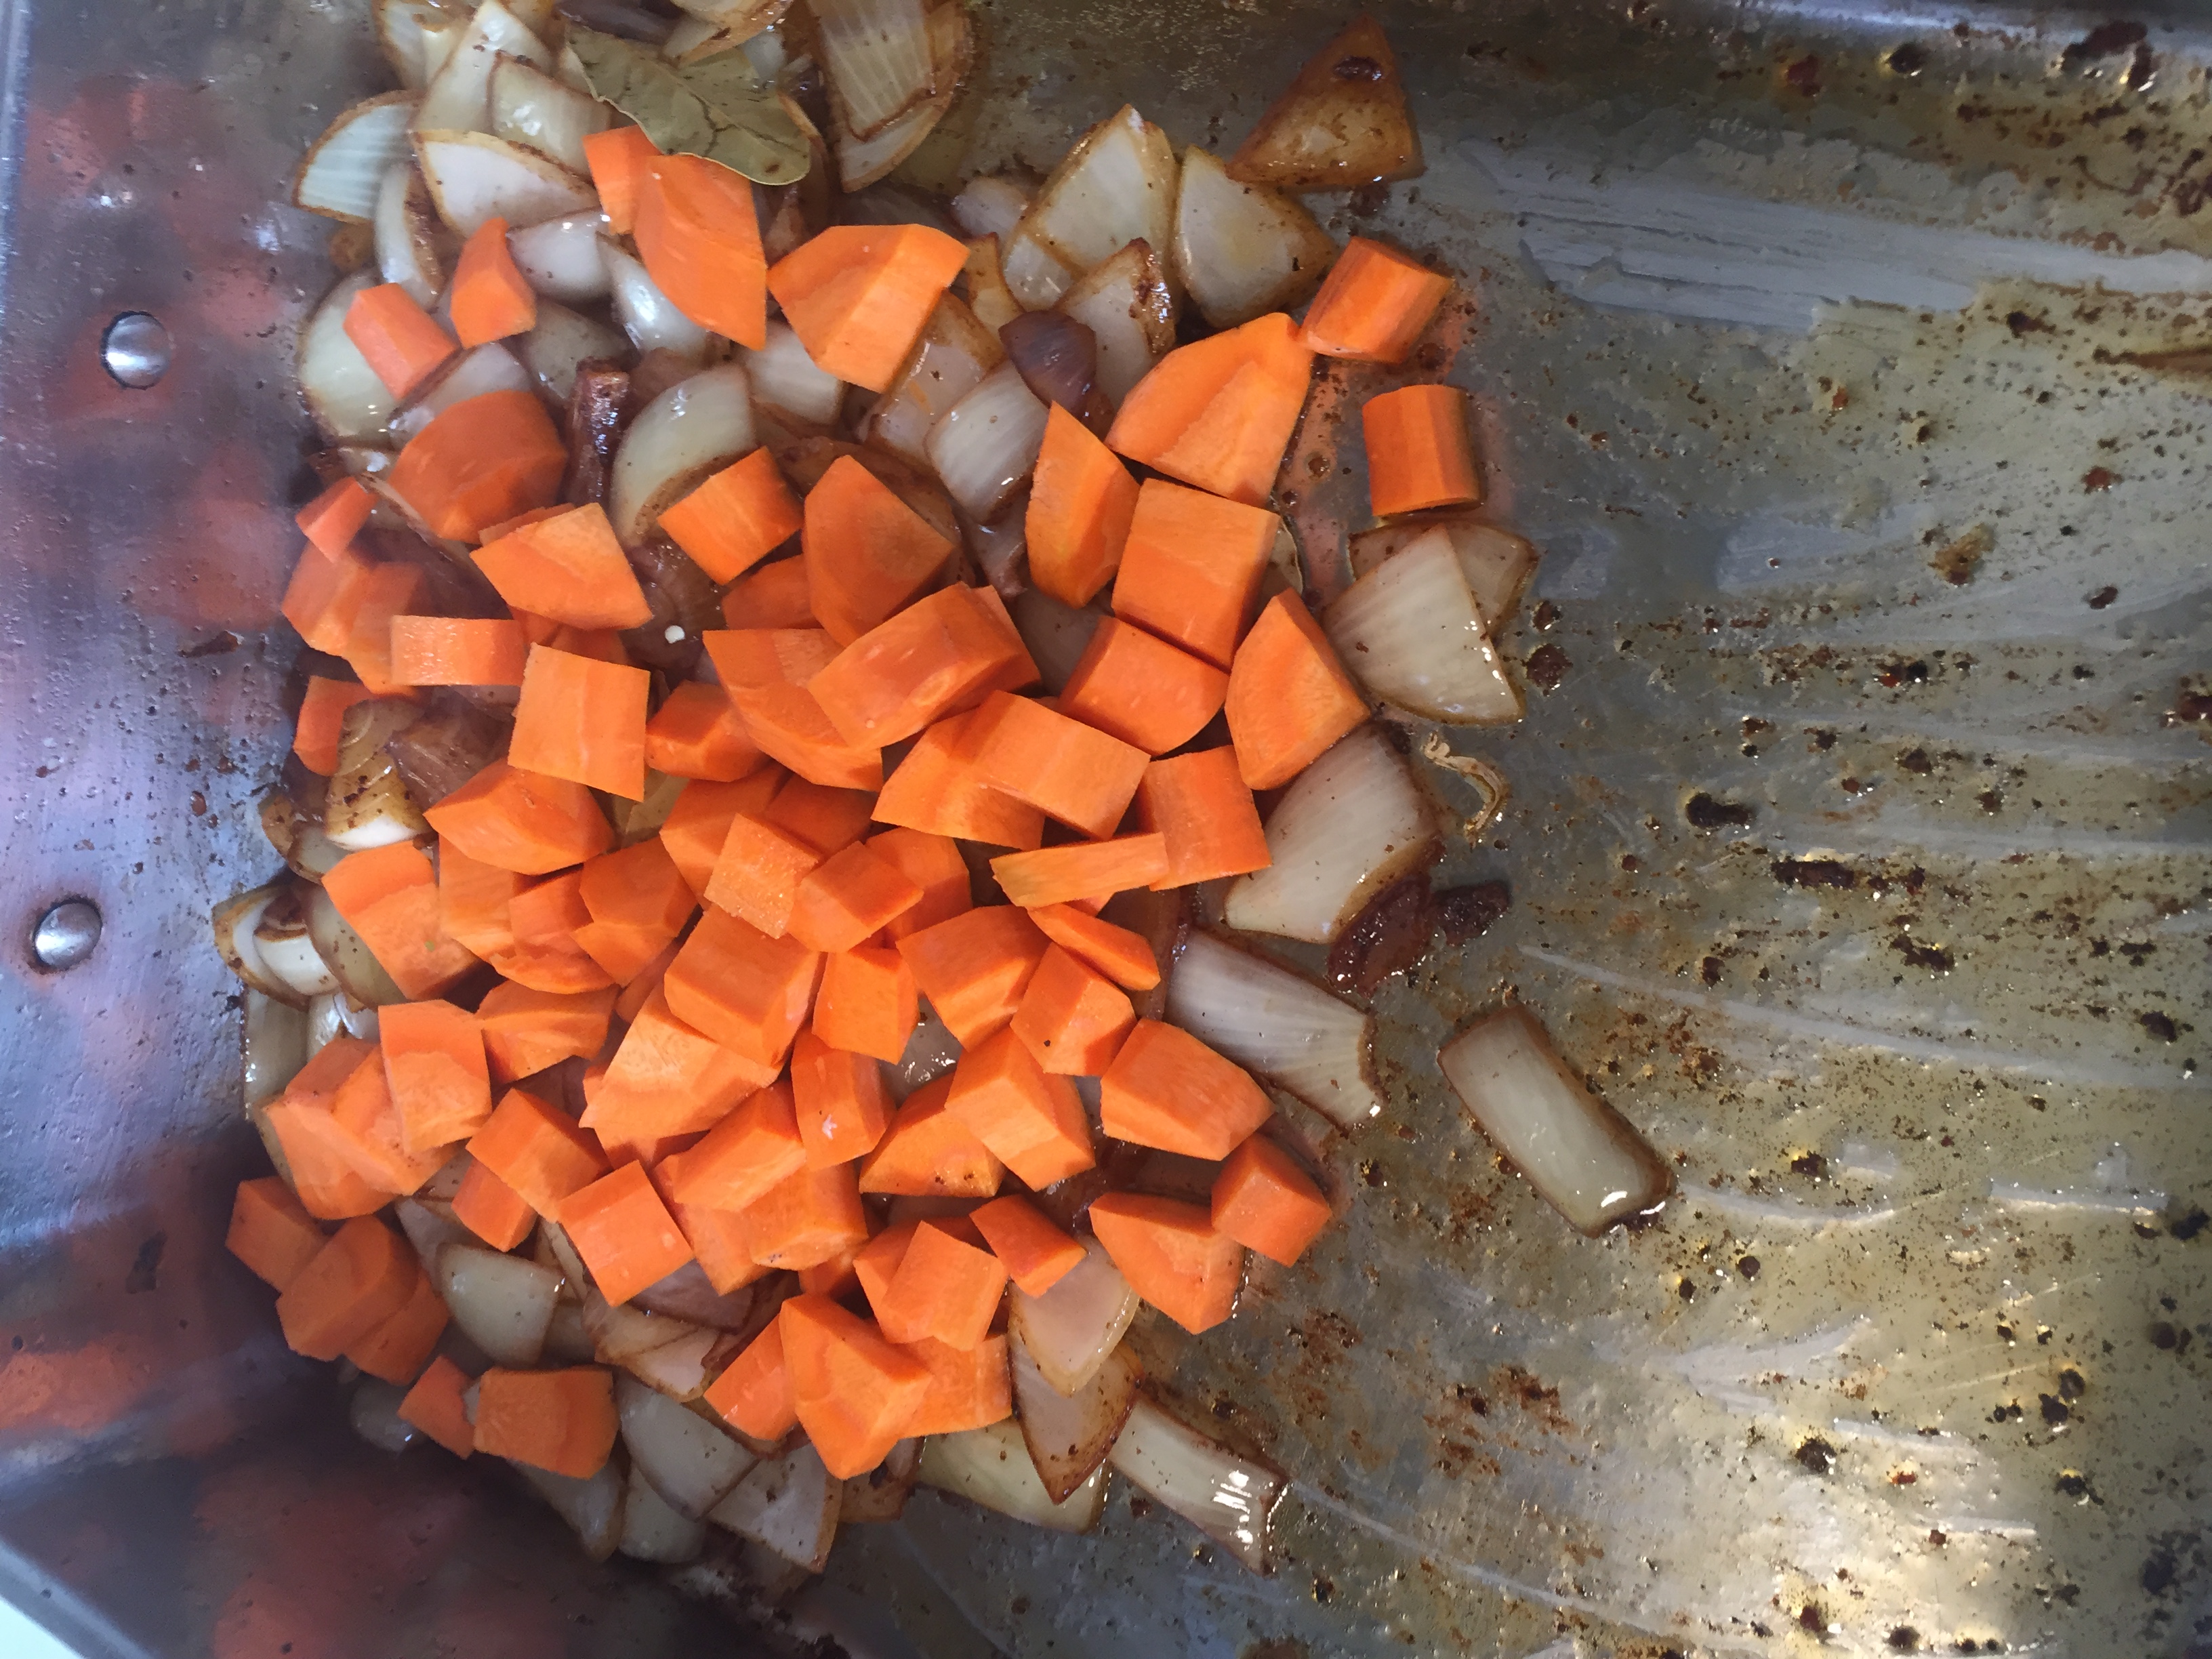
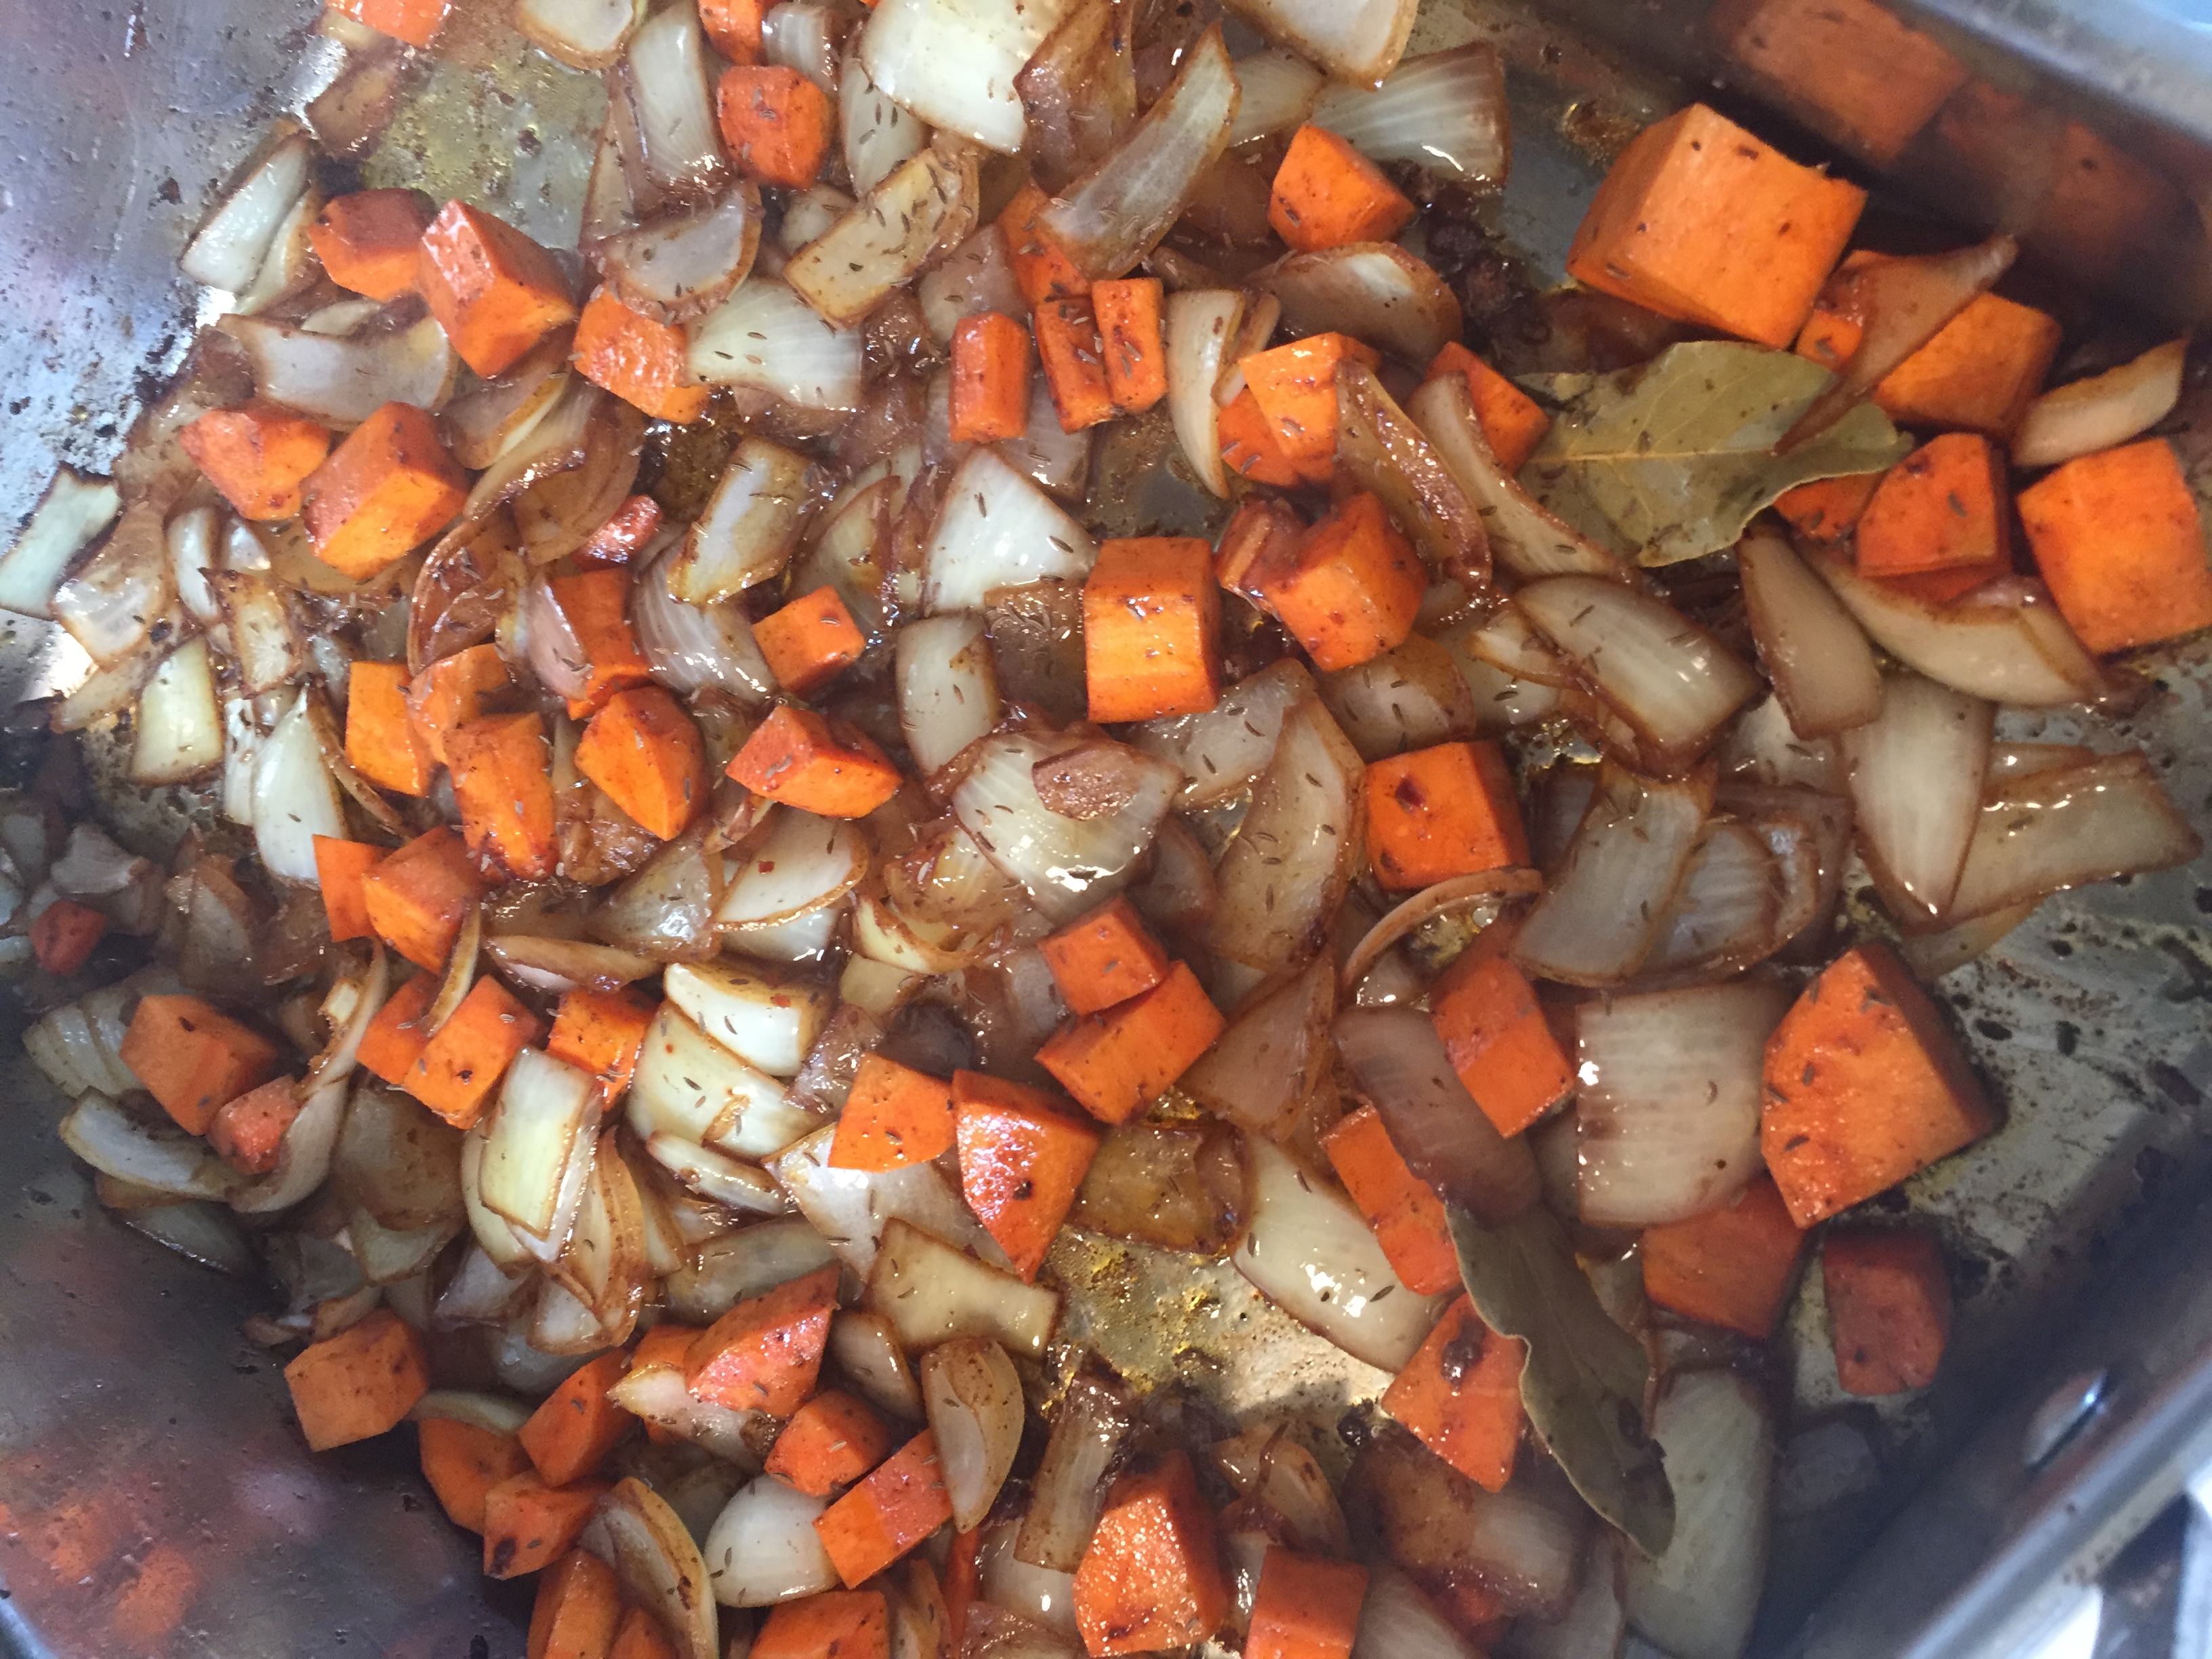
While the carrots are working and the onions continue to evolve, some bay leaves and caraway are added, followed by the celery (not pictured) and left to work in the pan until the celery begins to soften.
After the celery addition had time to work for a while, there were multiple additions to the pan, each one allowed to “work” for a bit to bring them into the fold.
2 tablespoons of tomato paste.
1 cup of tomato puree
8-10 cloves of gently crushed garlic
3/4 cup of apple cider vinegar
1/2 cup of light brown sugar
The flesh from 3 whole Cowhorn chili peppers, halved, seeded and de-veined. These made up the “pepper” portion of the recipe. You could certainly do Bell peppers if spicy heat is not your thing. This preparation brought a very nice, subtle heat to the dish and was nowhere near overpowering. Substitute Fresno, Serrano, Habanero or Jalapeno. They would all bring a great element to the dish.
Return the pork and sausage to the pan.
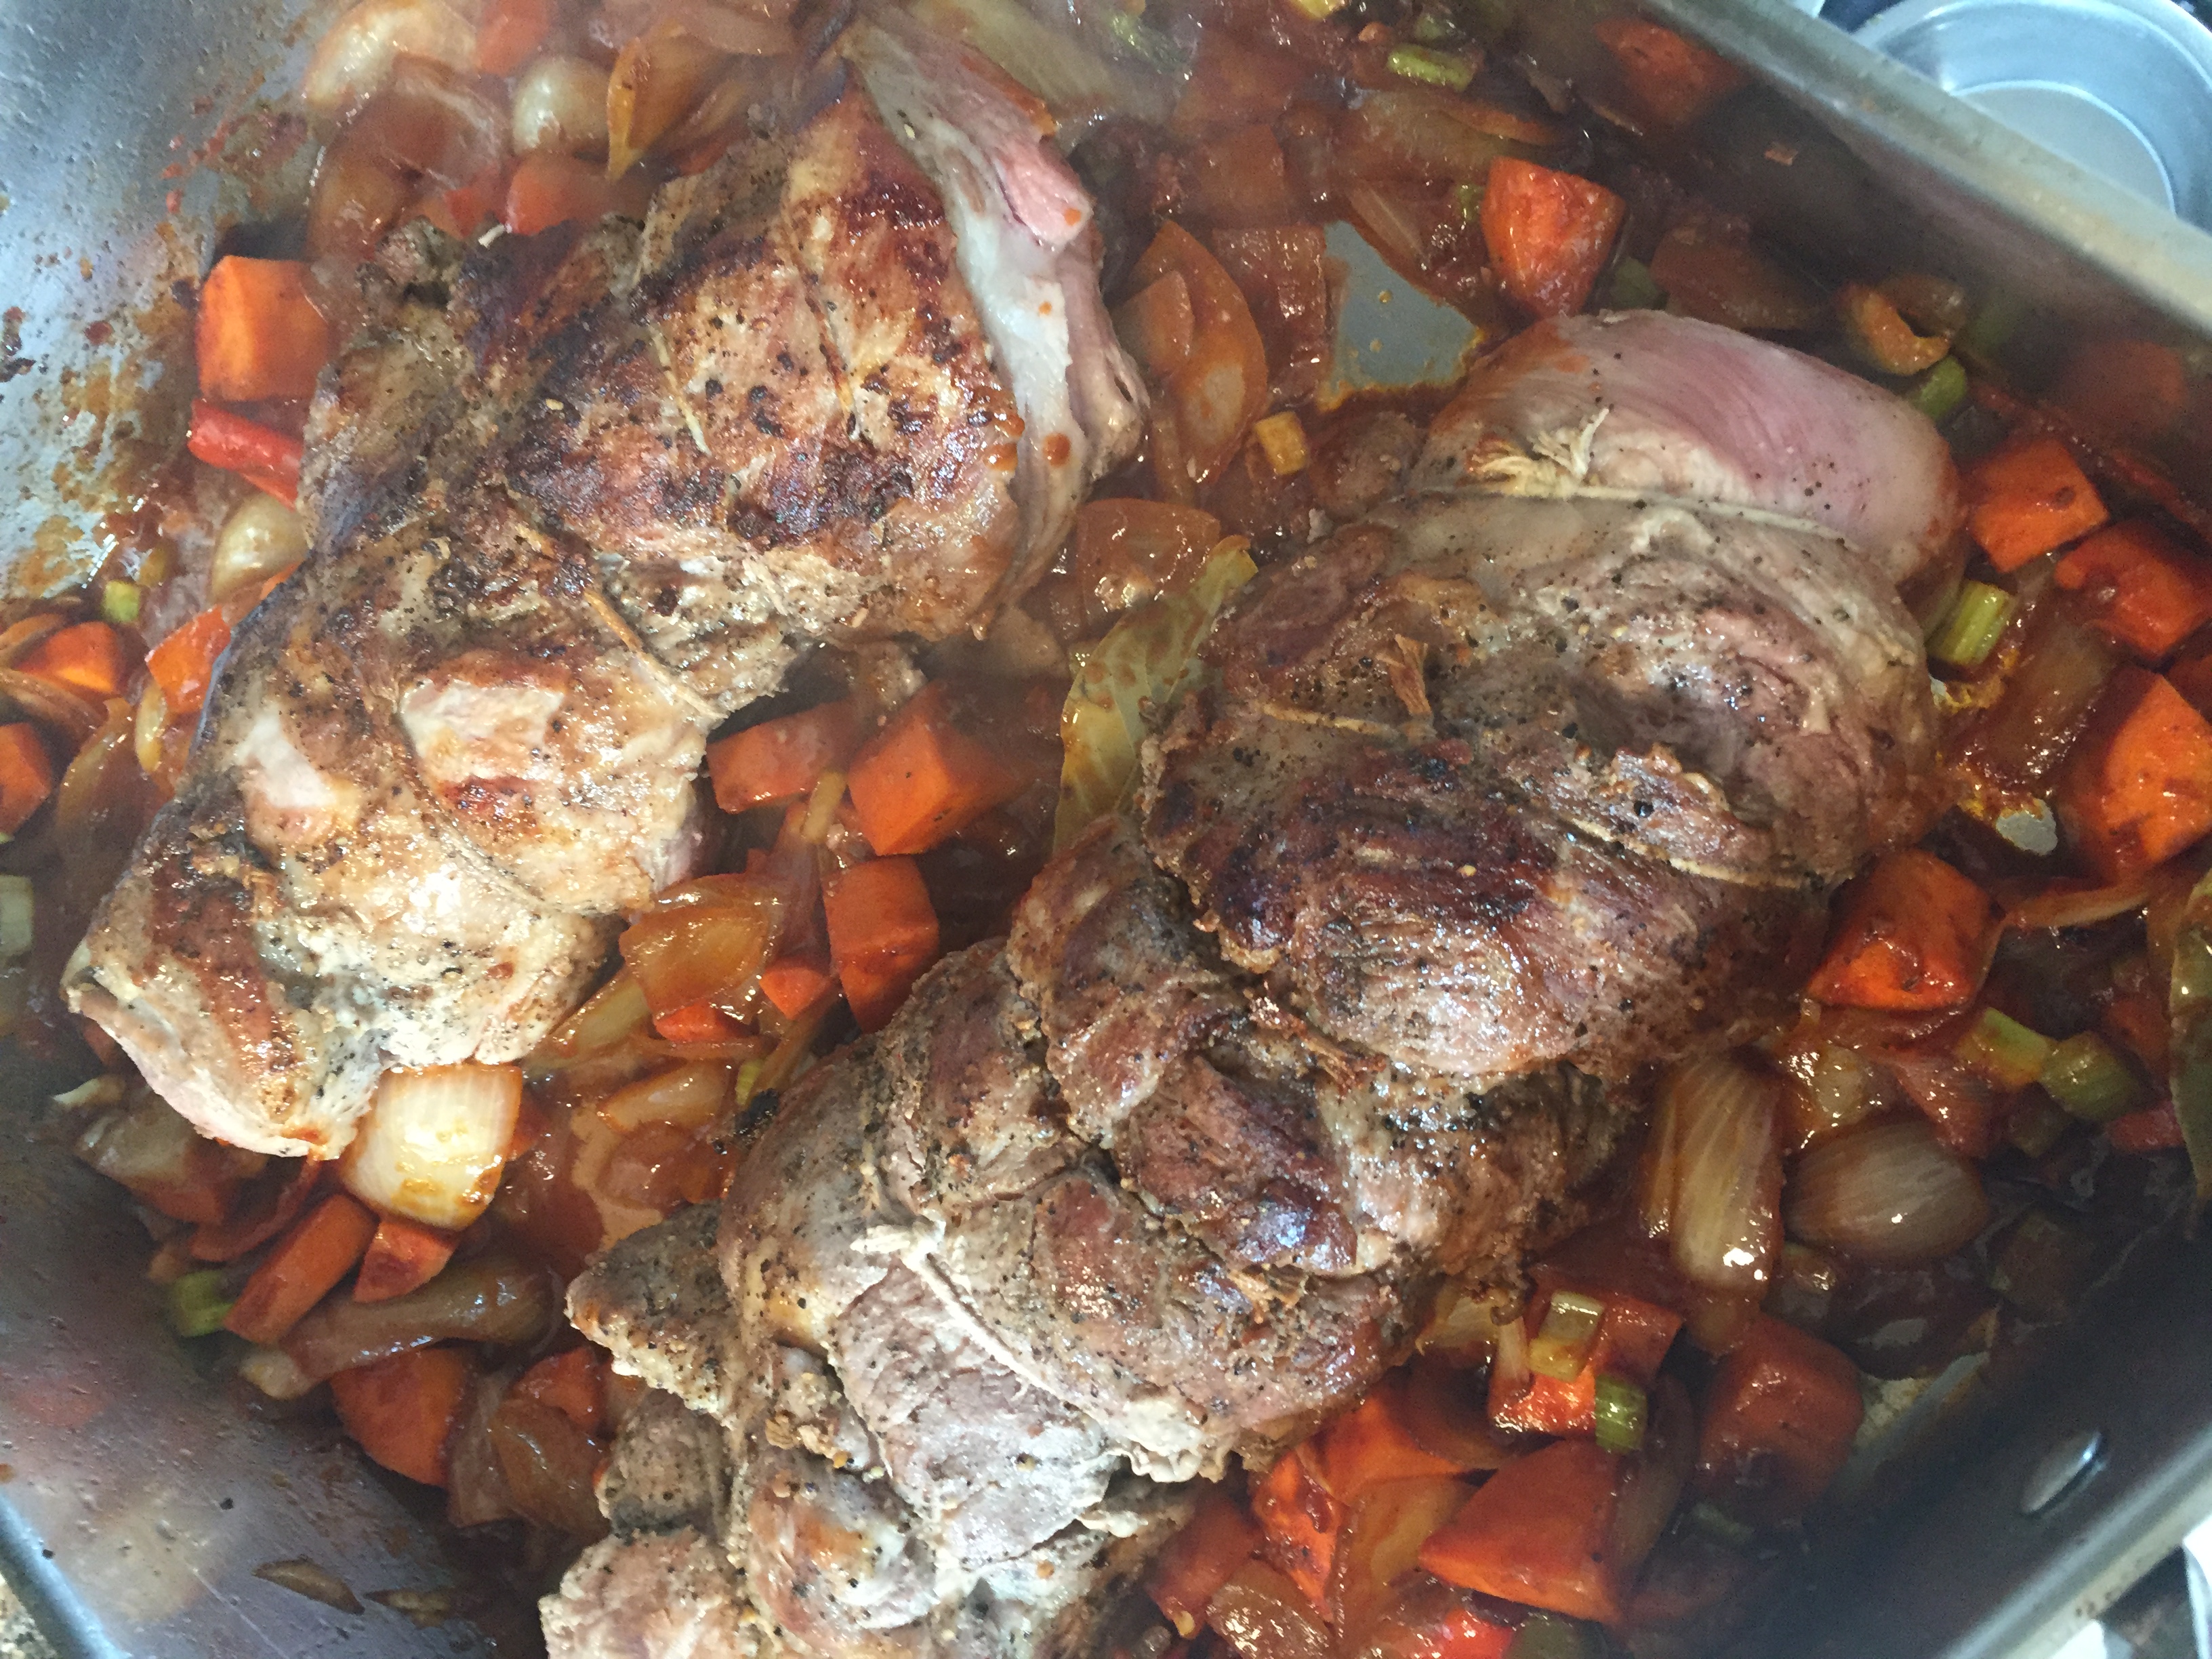

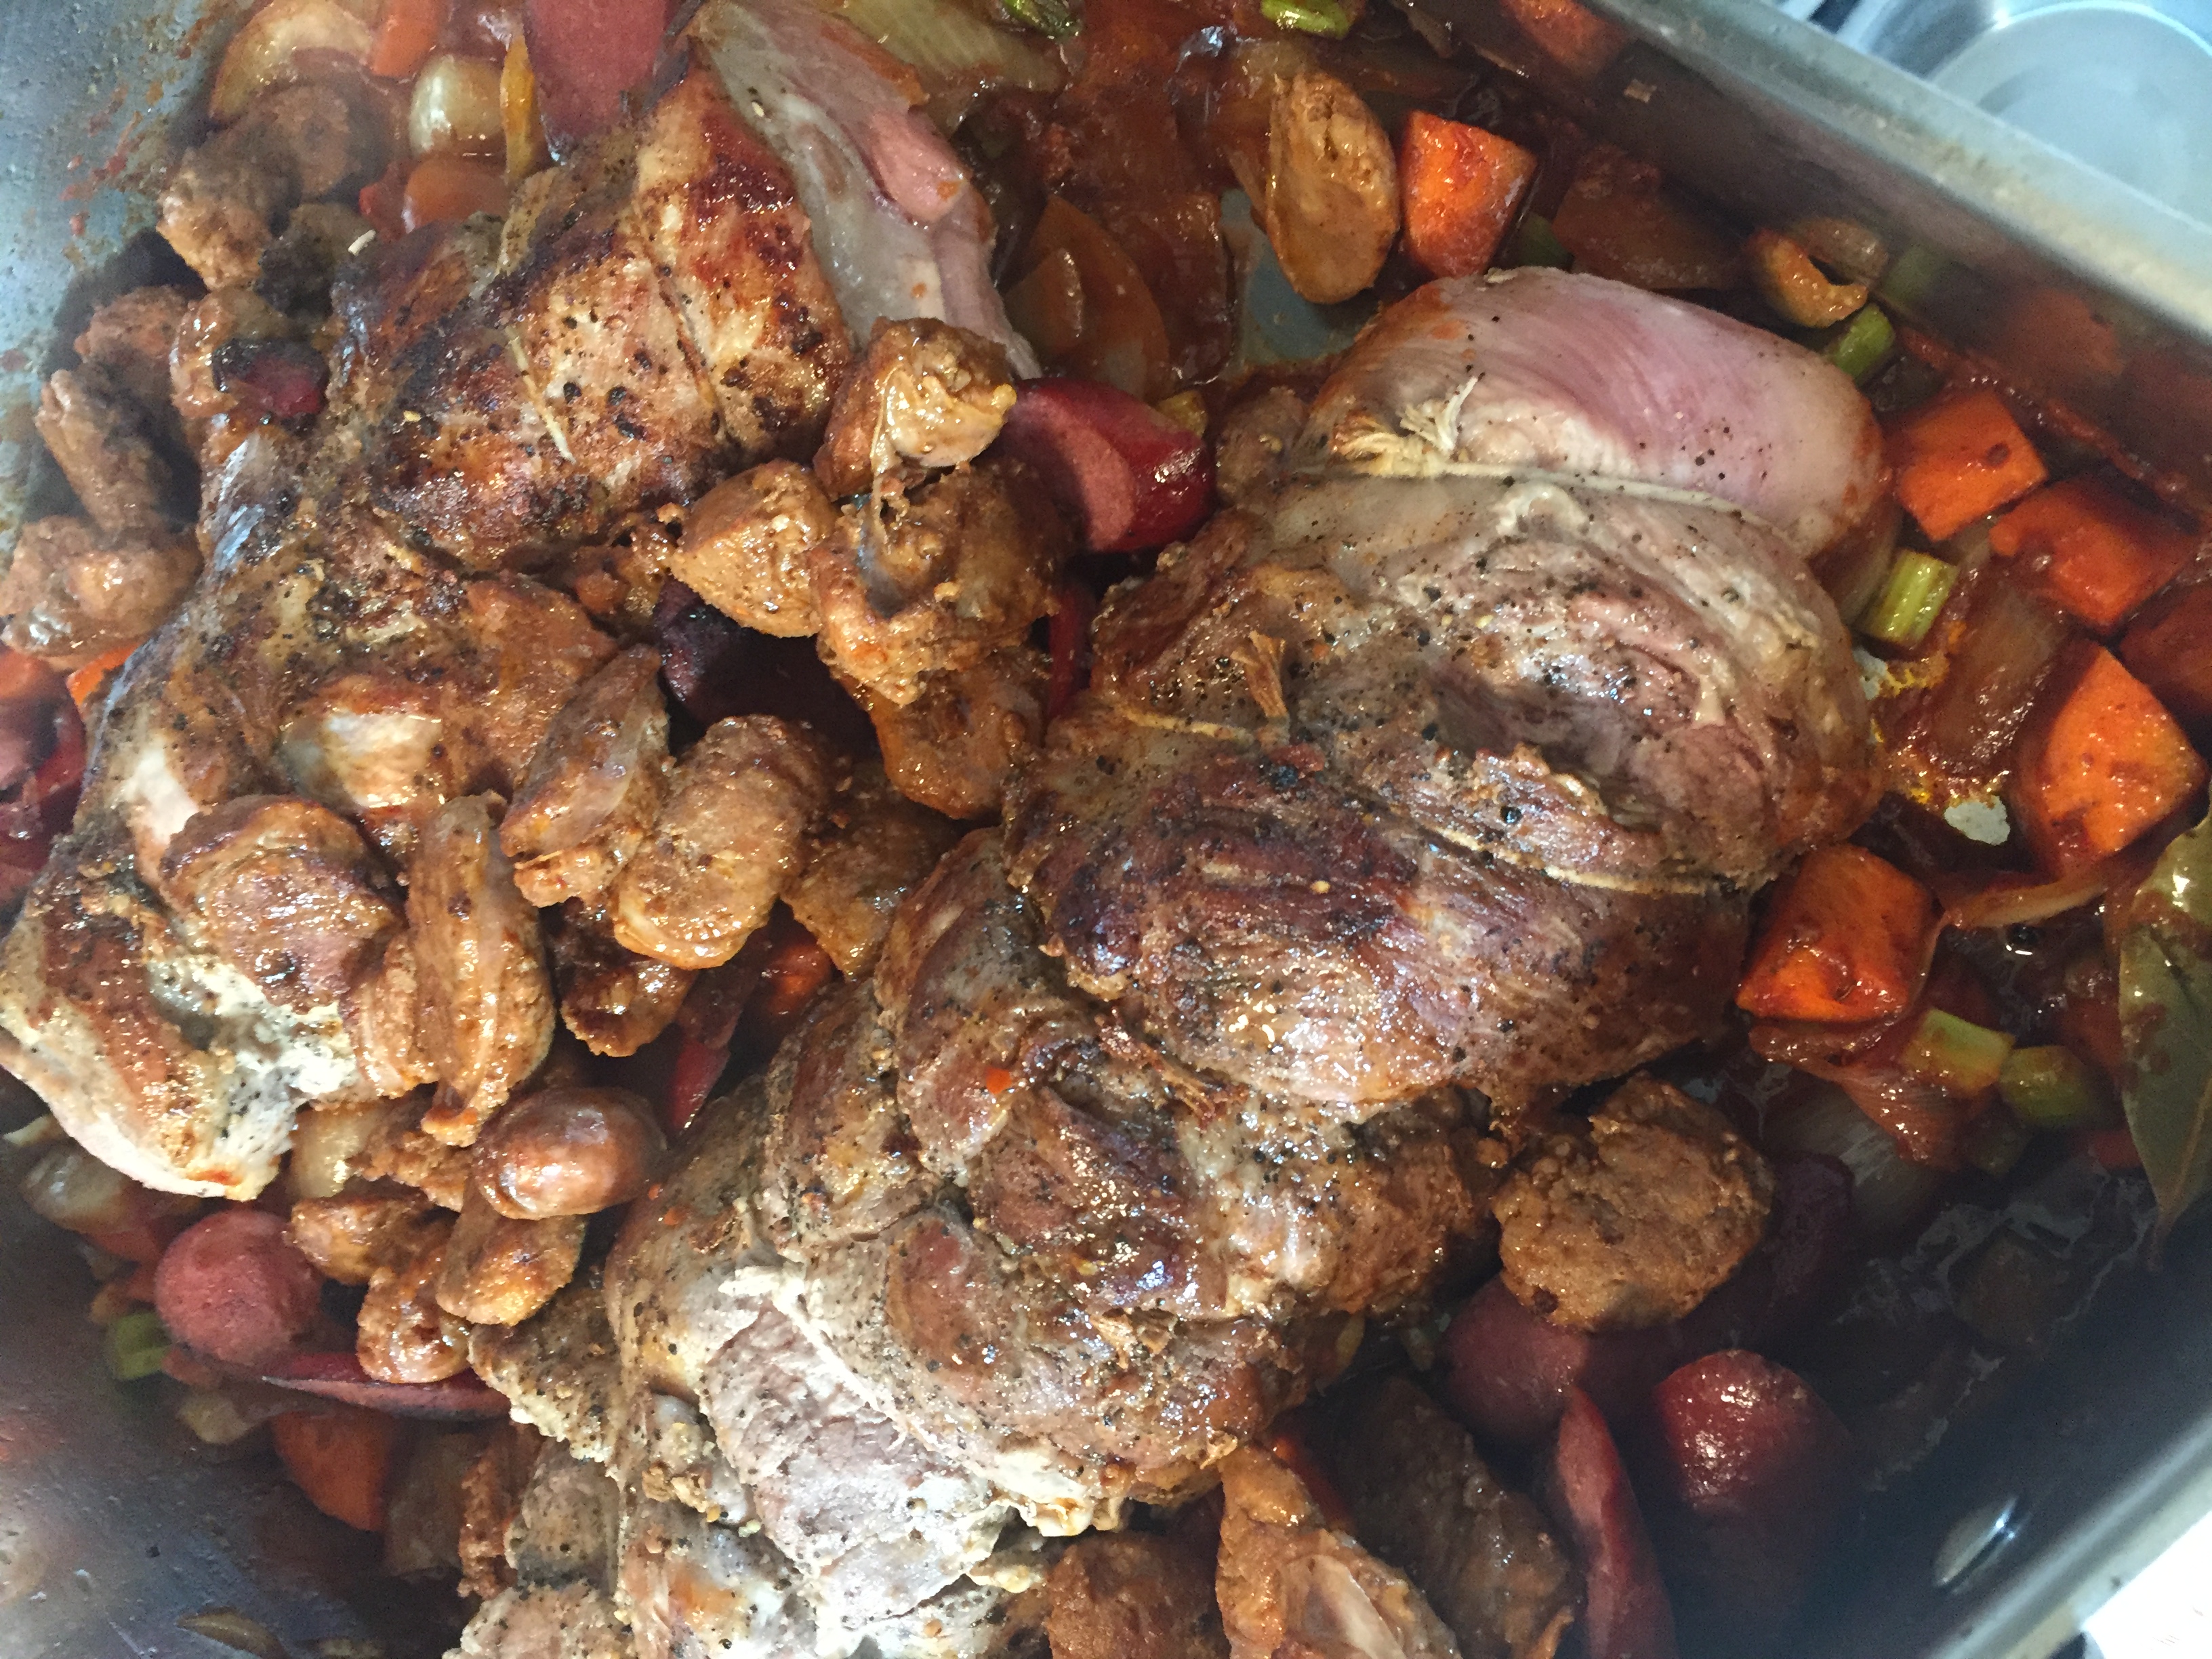
Add enough braising liquid – in this case straight water though it could have easily been cider – to cover the meat roughly halfway. I went a bit more than half given there was so much additional meat and I wanted a decent amount of broth left over for the reduction. Bring to a gentle simmer – do not boil. Add the flesh of 6 peeled, cored and chopped fresh apples – in this case freshly picked in Winchester Virginia (cut to 12 pieces per apple). The apples were mostly Golden Delicious, Stayman and Ida Red. Essentially whatever we harvested during our trip to Marker-Miller Orchards and Farms.

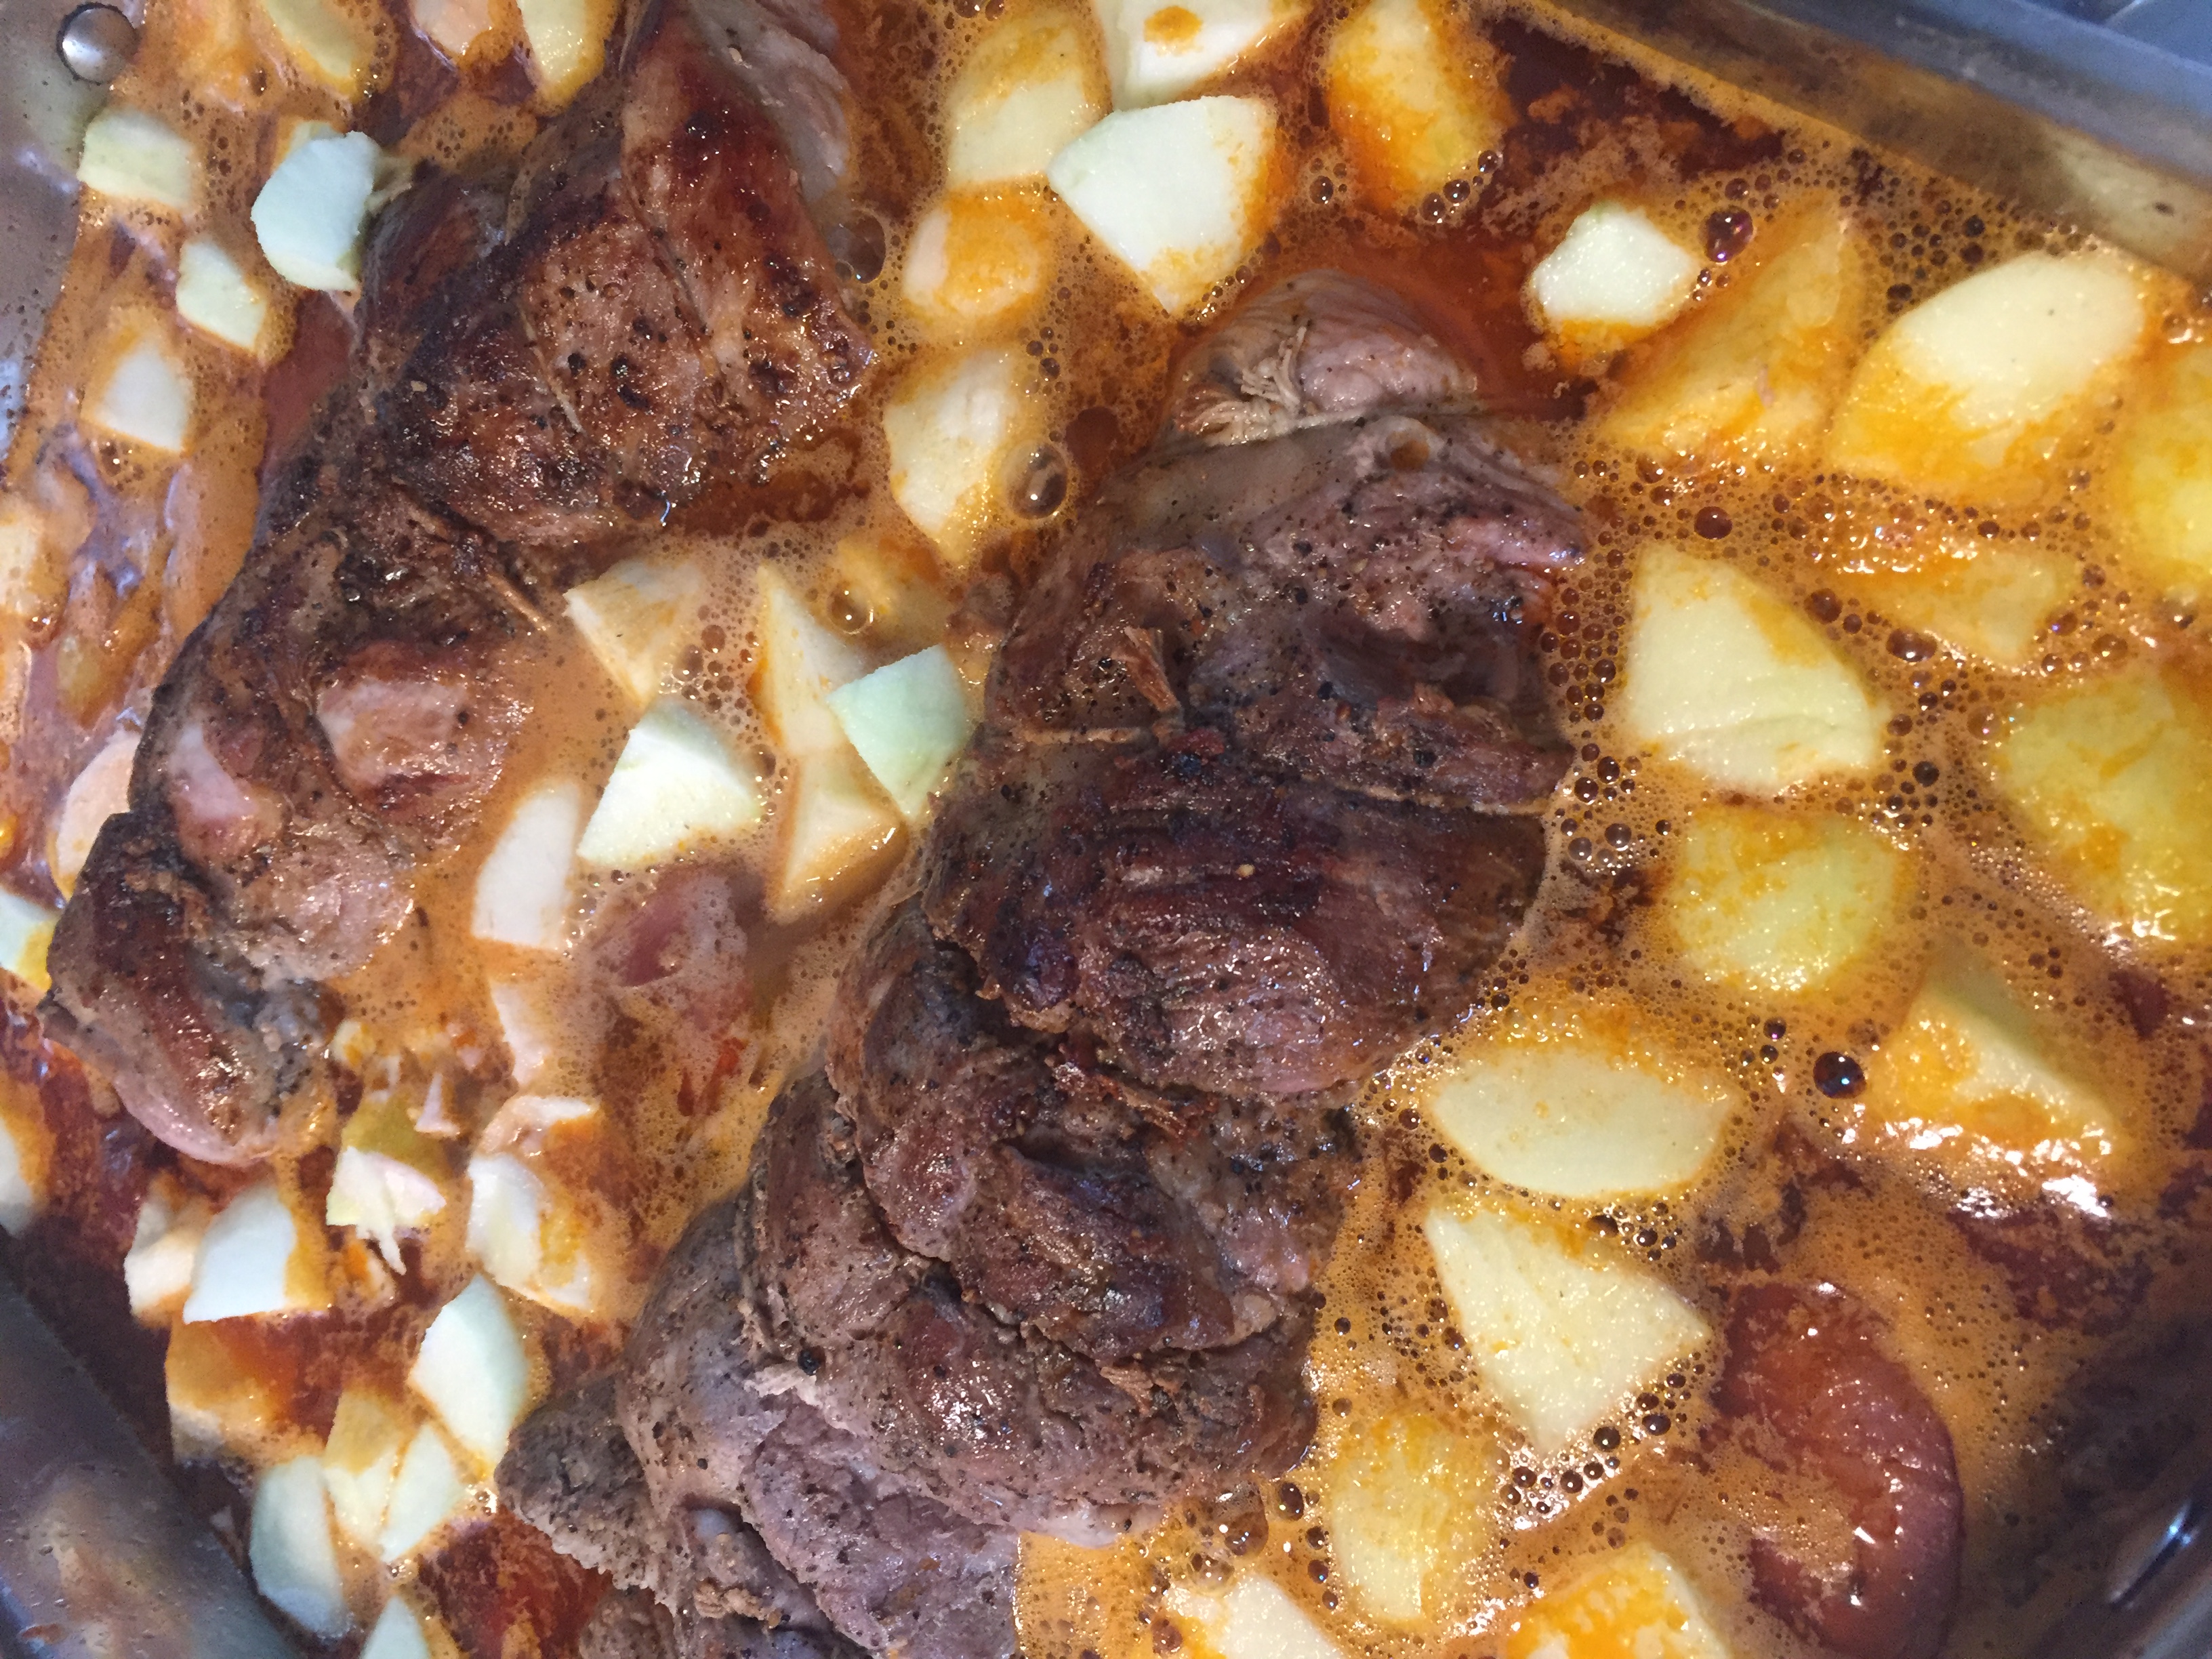
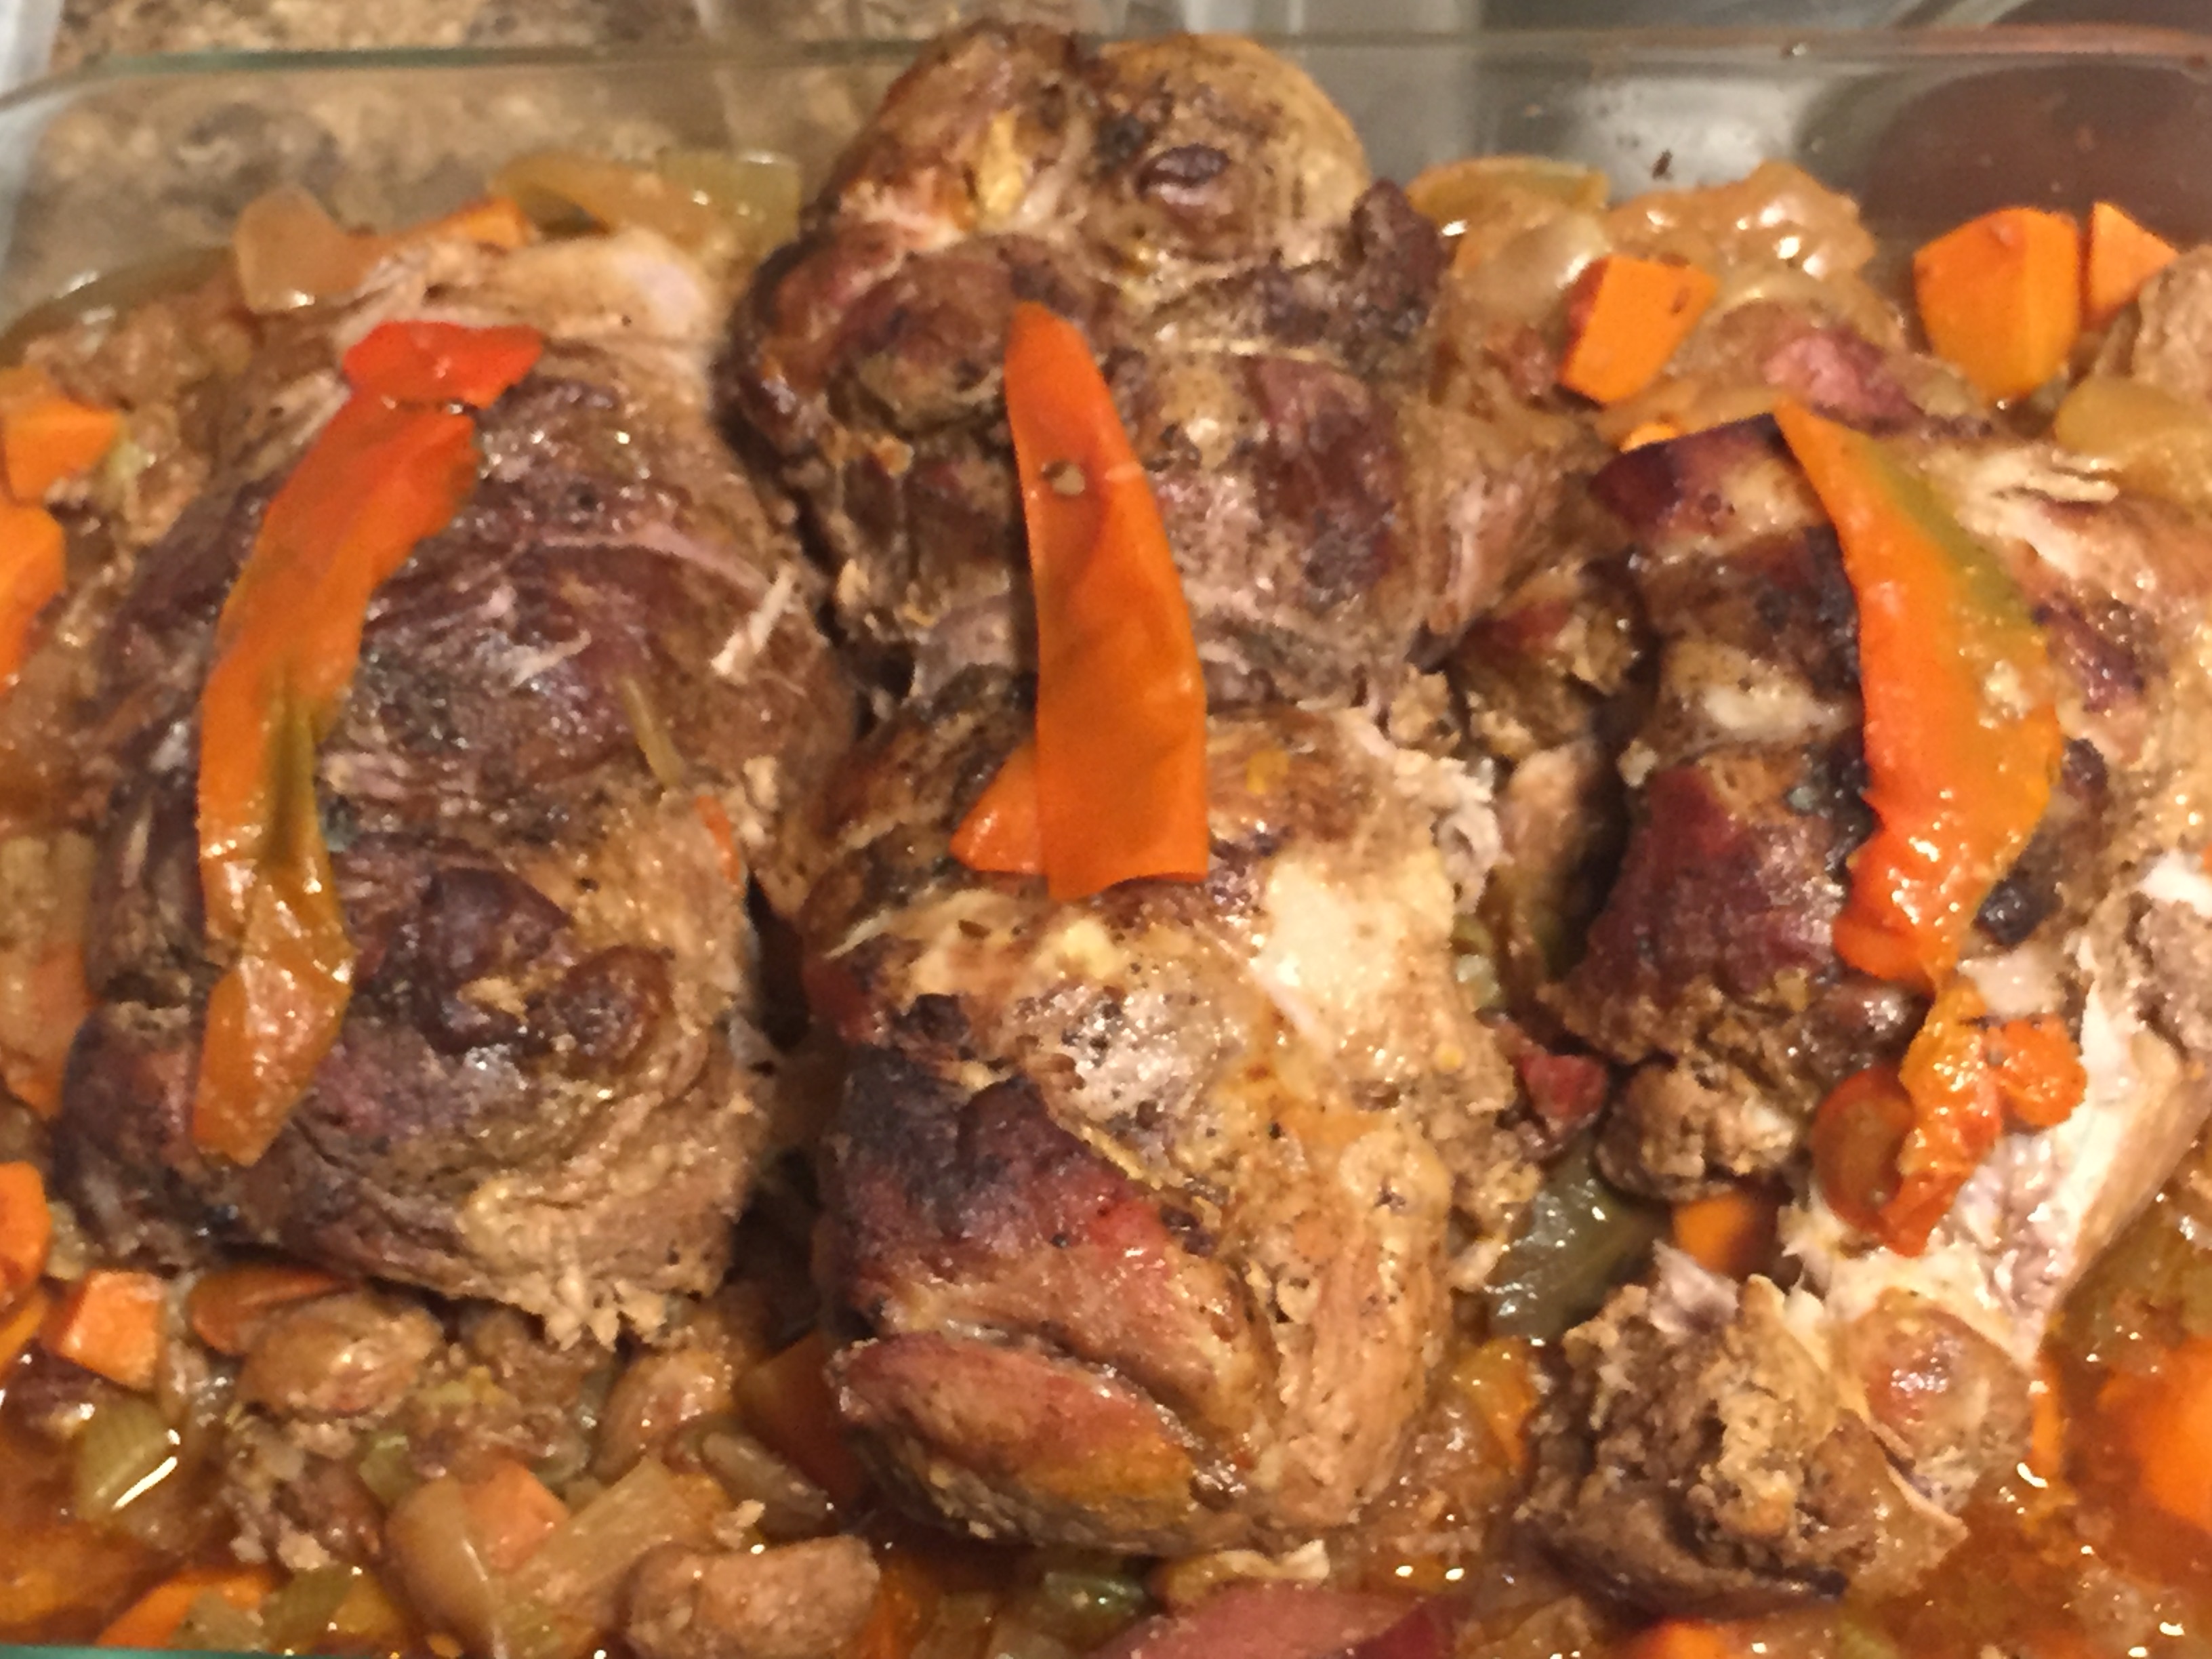
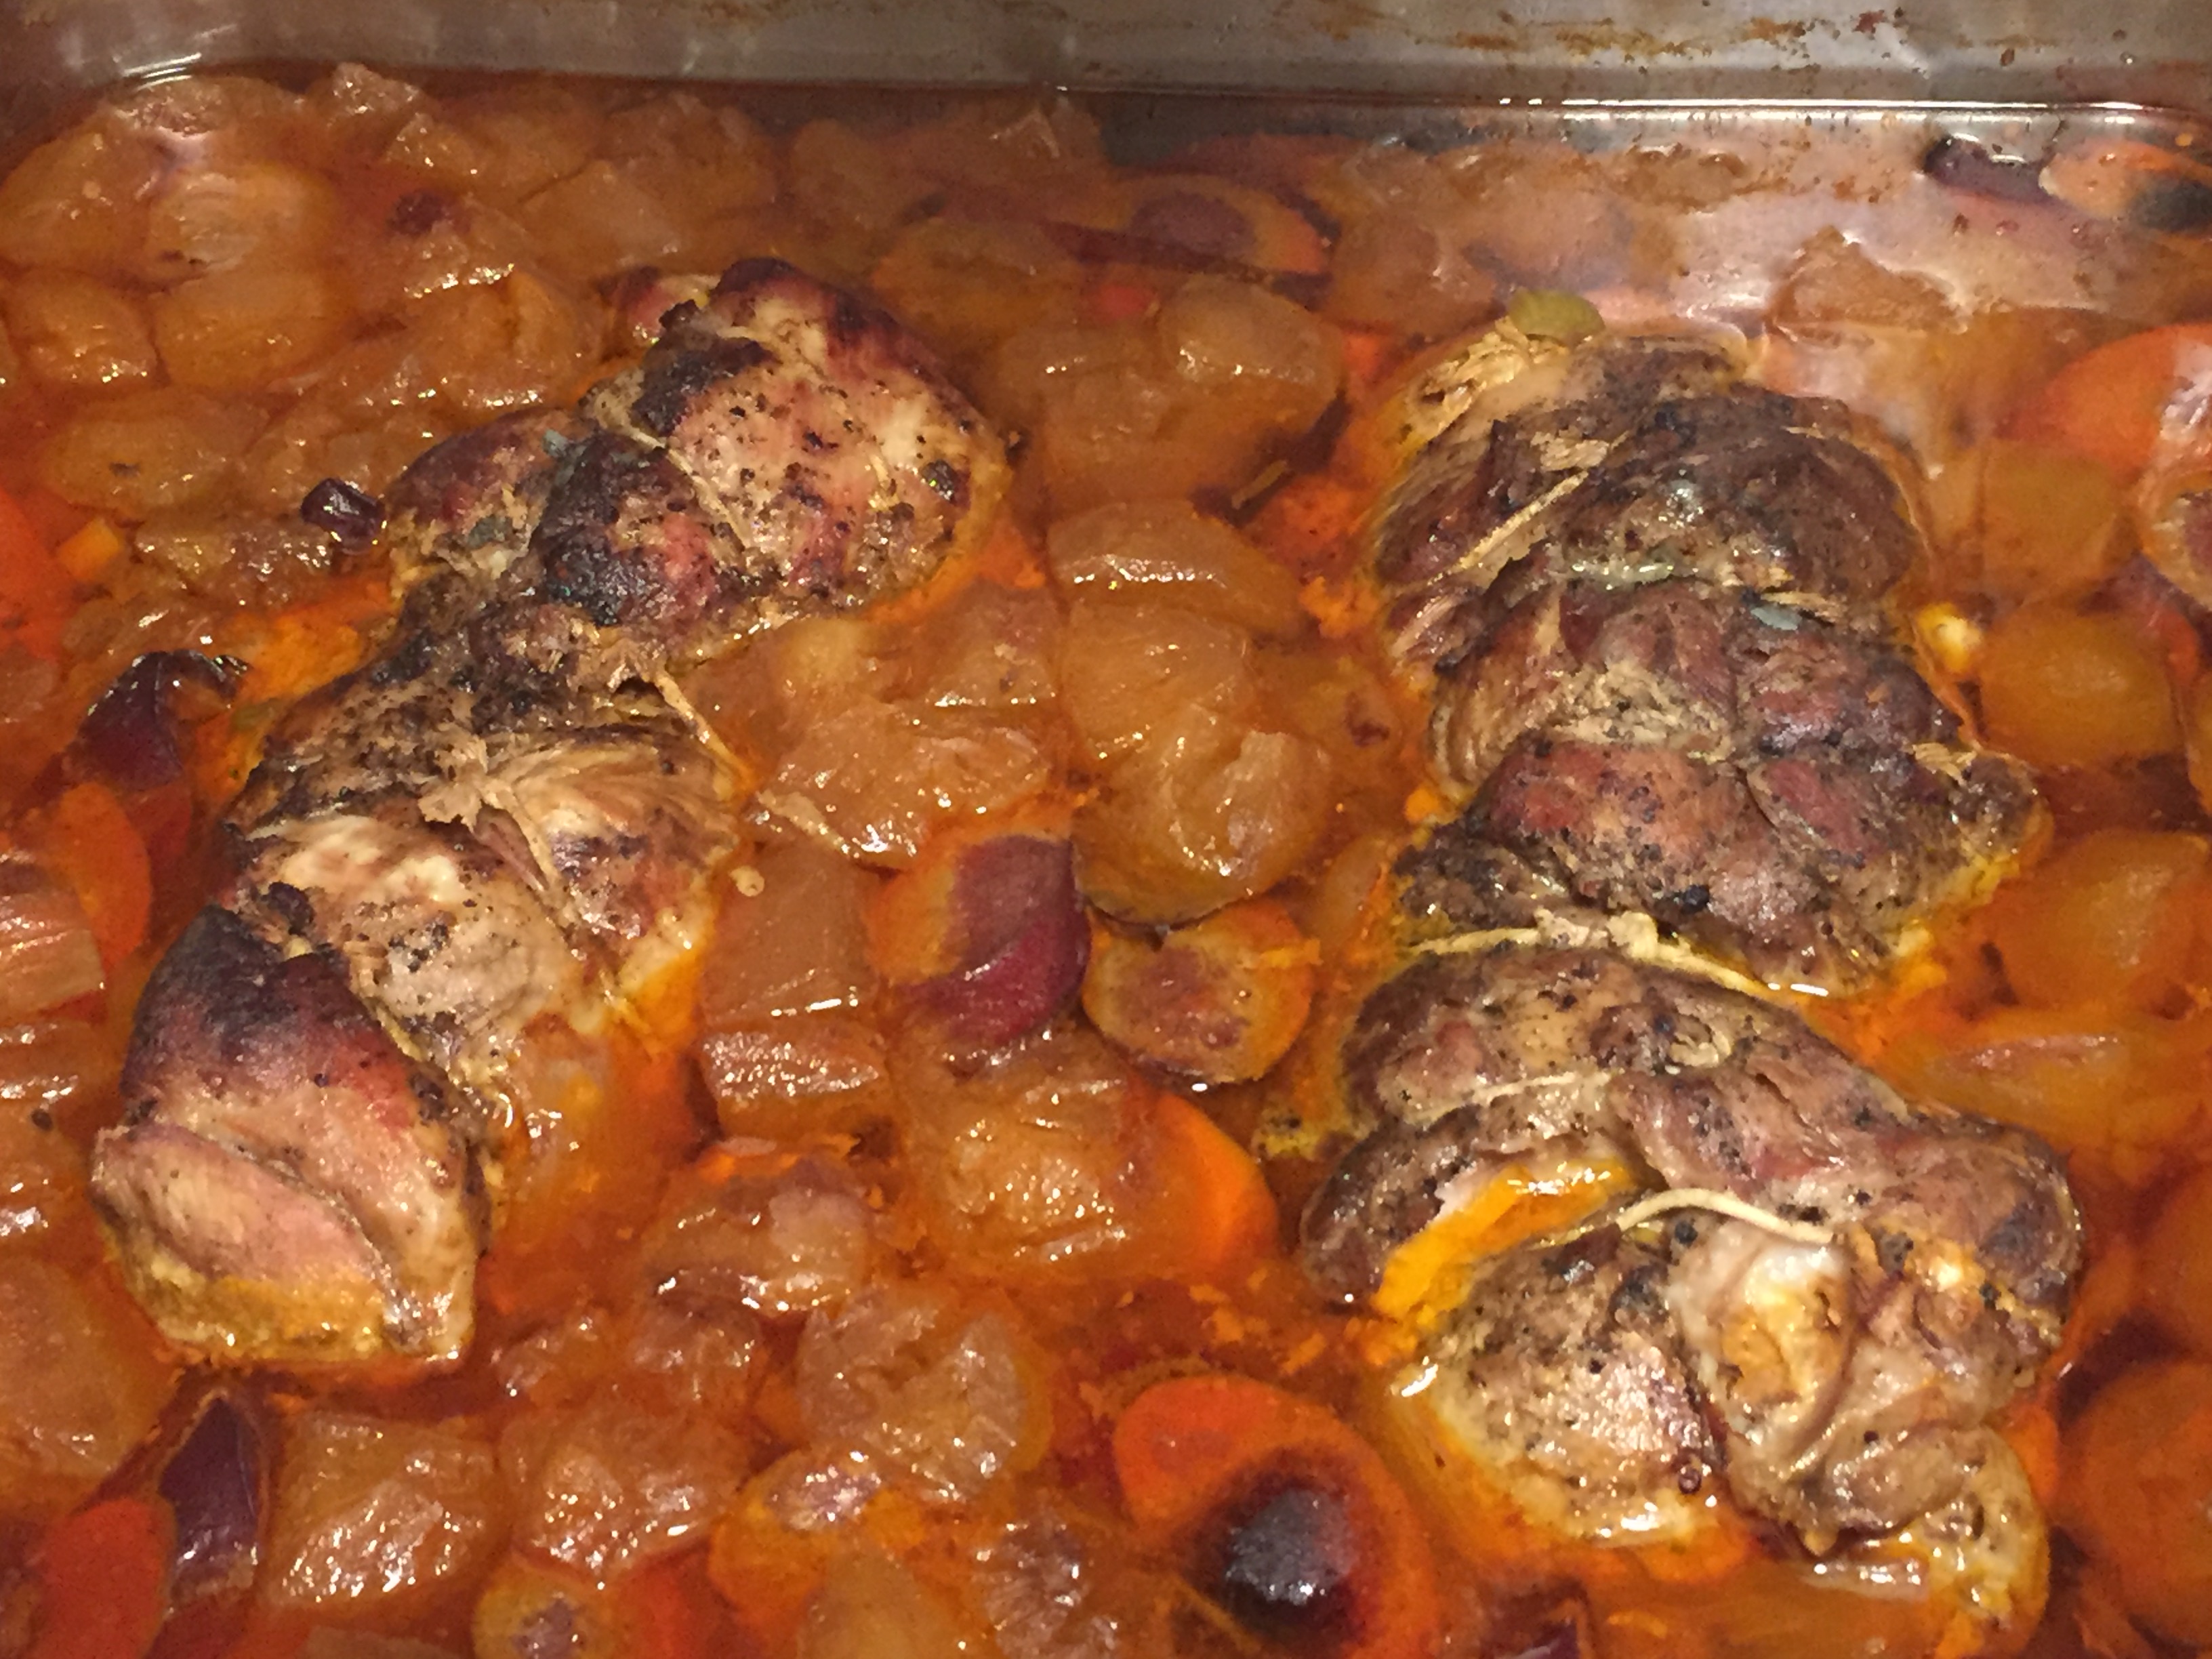
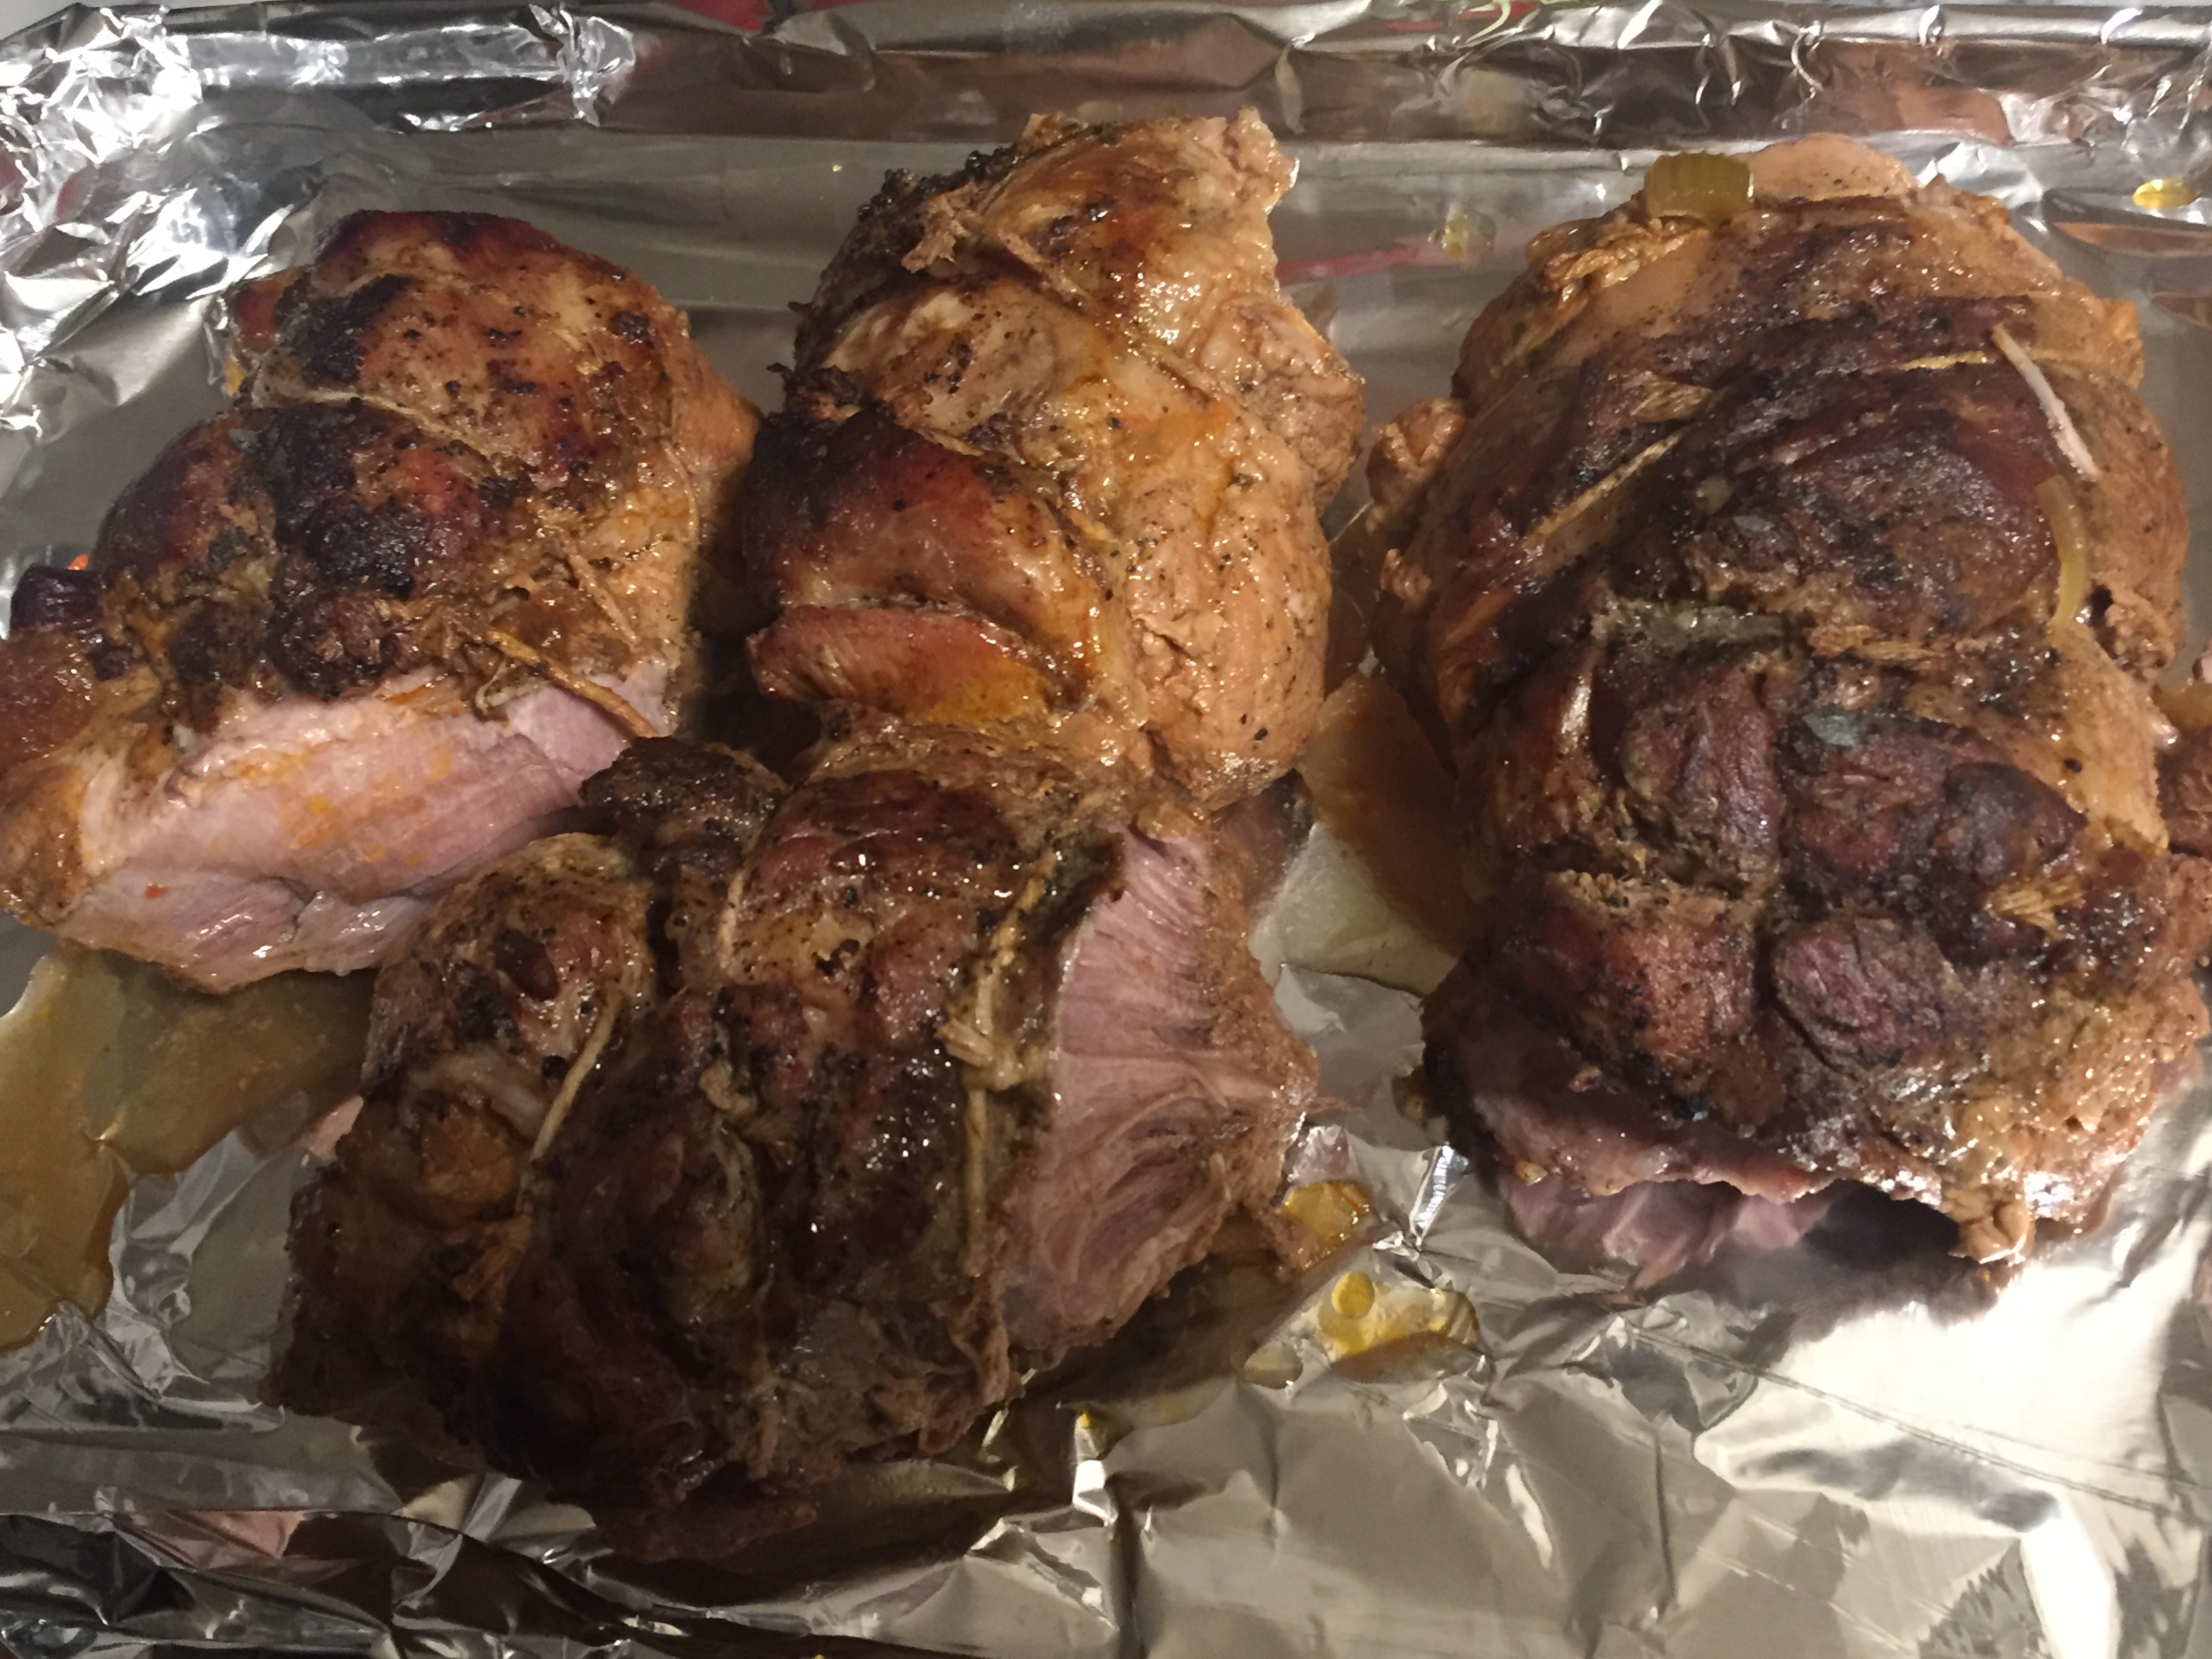
Once at a decent simmer, cover the pan tightly with foil and place in a pre-heated, 325 degree oven for 3 hours. Remove from the oven and set aside to rest, now loosely covered. After an hour or so, once the dish has cooled a bit, remove the meat from the pan and set aside to rest while you drain the pan liquid and reserve the vegetables. Feel free the break the two pieces into four – as was done here. Once cooled a bit, remove the trussing, slice or break apart to your liking and serve atop a bed of the braising veg. Spoon on some pan liquid if you like, though the dish and veg should be plenty moist. Or you can reduce the remaining sauce the next day after it cools in the refrigerator and the fat is skimmed. This is my preferred method for any animal based stock or broth. The sauce from this dish was later reduced by 50 percent and used to dress the dish the next day. For an idea of making tighter reductions, look here.
Leave a Reply